


How to Childproof Your Home A Practical Guide
Childproofing your home is about so much more than just plugging in a few outlet covers. It’s a proactive, layered approach—a way of seeing your home through your child’s curious eyes and neutralizing hazards room by room. It’s about anchoring furniture, securing cabinets, installing gates, and managing cords to create a true safe space for them to explore.
This whole process has to adapt as your little one grows, making sure your safety measures keep up with their latest developmental leap.
Why Childproofing Is More Than Just Covering Outlets
It happens in a blink. You turn around to answer the phone, and suddenly your toddler is halfway up a bookshelf. It’s not a reflection of your parenting; it’s a stark reminder that our homes were built for adults, not for tiny, adventurous explorers. The best way to start is to reframe how you see childproofing—it's not a tedious chore, it's an act of love that gives your child the freedom to learn and play safely.
A lot of parents get caught in the trap of thinking constant supervision is a substitute for physical safeguards. While being watchful is absolutely critical, even the most dedicated parent can’t be everywhere at once. A solid safety plan empowers both of you by minimizing risks before they turn into accidents.
Understanding the Real Risks in Your Home
The reality is that everyday items can pose a serious threat. A recent report from SafeHome.org revealed that 59% of families have had at least one child get injured at home. Even more telling, parents estimated that over half of those injuries could have been prevented with better childproofing.
What’s the number one cause? Falls, especially involving stairs, which are responsible for more than 309,000 emergency room visits for young children every single year.
A truly childproofed home isn’t about creating a sterile bubble. It's about thoughtfully removing the most common and severe hazards so your child’s natural curiosity can flourish without constant danger.
Evolving Dangers for Growing Children
Your childproofing strategy needs to grow right alongside your child. The hazards that matter for a newborn are completely different from those for a newly crawling baby or a determined toddler.
Anchoring furniture, for example, becomes a non-negotiable task the second your child can pull themselves up. Knowing how to secure furniture to the wall is one of the most important skills a parent can have.
This timeline gives a great overview of how safety priorities shift as your child hits new milestones.

As you can see, the focus expands from just the immediate sleep area for a newborn to the entire home for a toddler. By understanding this progression, you can stay one step ahead and make your home a secure haven for every stage.
Childproofing Priorities by Developmental Stage
To make this a bit more concrete, I've broken down the key priorities by your child's stage. This helps you focus your energy on what matters right now instead of getting overwhelmed by a giant to-do list.
| Developmental Stage | Primary Hazards to Address | Essential Safety Devices |
|---|---|---|
| Newborn (0-6 months) | Suffocation risks in sleep areas, accidental falls, hot liquids. | Safe crib, baby monitor, smoke detectors, water thermometer. |
| Crawler (6-12 months) | Low-level electrical outlets, sharp corners, choking hazards, toxic substances in low cabinets. | Outlet covers, cabinet locks, corner guards, safety gates. |
| Toddler (1-3 years) | Furniture tip-overs, climbing dangers (windows, stairs), drowning risks, poisoning. | Furniture anchors, window guards, stair gates, toilet locks, door knob covers. |
Think of this table as your roadmap. As your child masters a new skill, like crawling or pulling up, you can refer back to it to see what new areas of your home need attention. It turns a daunting task into a manageable, step-by-step process.
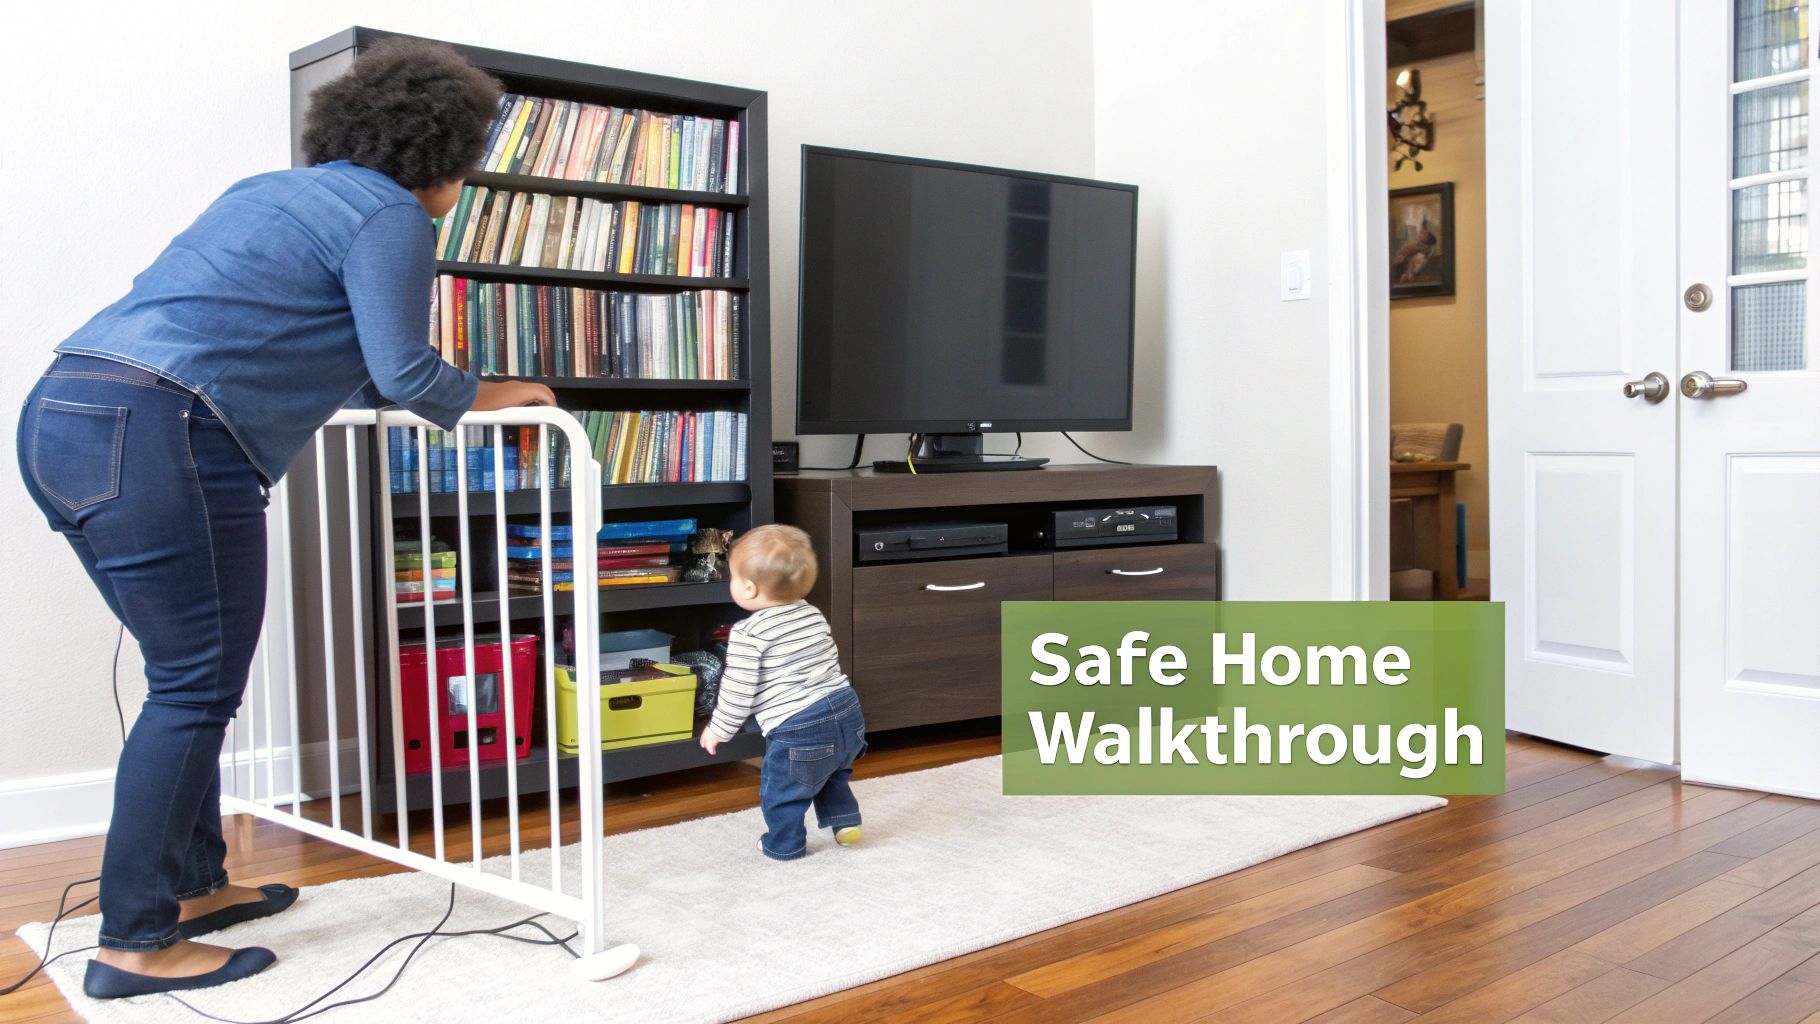
Your Room-By-Room Home Safety Walkthrough
Childproofing your entire home can feel like a massive undertaking. I get it. But the secret is to break it down, room by room. This turns a mountain of a project into a series of small, manageable wins. The best way to start? Get on your hands and knees and see the world from your child's point of view. What’s shiny and tempting? What’s just within their grasp?
Think of this walkthrough as your practical guide to spotting and sorting out hazards in the spaces your family uses most. It's not about creating a bubble, but about creating a safer environment where your little one’s curiosity can flourish without unnecessary risks.
Securing the Living Room and Family Spaces
The living room is the heart of the home, which means it’s packed with potential hazards right alongside all the family fun. This is ground zero for first steps, first block towers, and, yes, first attempts at scaling the furniture.
Your absolute number one priority here has to be furniture stability. That bookshelf that seems so solid or the TV on its stand can become a serious tipping hazard once your toddler starts pulling up. Every year, thousands of kids end up in the ER from furniture tip-overs. Anchoring heavy items—TVs, dressers, bookcases—to the wall with anti-tip straps is completely non-negotiable.
Another classic living room danger zone is the jungle of electrical cords behind the entertainment center. To a curious crawler, those wires are just begging to be pulled.
- Bundle and Hide Cords: Grab some cord organizers or sleeves to group wires together. Run them behind furniture or along baseboards so they’re out of sight and out of mind.
- Block Access: Sometimes, the simplest fix is the best one. Can you rearrange the sofa to block off the entire entertainment unit and its cluster of outlets?
- Cover All Outlets: Every unused outlet needs a cover. I’m a big fan of the sliding plate covers that automatically close when you unplug something. You never have to remember to put a plug back in.
Finally, take a hard look at your coffee table. Those sharp corners are at the perfect height for a wobbly toddler to run into. Soft corner guards or bumpers are a quick fix that can prevent a lot of tears and painful bumps.
Creating a Safe Kitchen Environment
The kitchen is a sensory overload of fascinating sounds, smells... and dangers. From hot stoves to sharp knives, this room demands a layered approach to safety. Your first job is to decide which areas are accessible and which are completely off-limits.
A trick that works for many parents is creating a "yes space." Designate one low drawer or cabinet just for them, and fill it with safe items like plastic bowls, wooden spoons, and silicone spatulas. This gives them their own spot to explore, which can brilliantly redirect their attention away from the things you don't want them touching.
For the cabinets and drawers that need to be secured, you’ve got a few solid options:
- Magnetic Locks: These are my personal favorite because they're installed on the inside, keeping your kitchen looking clean. You just need the magnetic "key" to open them, which is great for outsmarting clever toddlers.
- Adhesive Strap Locks: Perfect if you're renting or need to secure appliances like the fridge or dishwasher. They stick right on the outside and don't require any drilling.
- Spring-Action Latches: This is the more traditional style you’ve probably seen before. They work, but they can be a pain for adults trying to open a drawer one-handed while holding a baby.
Beyond locks, stove safety is critical. Use knob covers to stop little hands from turning on the burners, and think about adding an oven lock. And always, always turn pot handles toward the back of the stove so they can't be grabbed.
A simple but effective kitchen rule is to create a visual boundary. Use a small, colorful rug or even some painter's tape on the floor to mark a "no-go zone" around the stove while you're cooking. It’s a great way to start teaching your child about safe distances from a young age.
Making the Bathroom a Secure Zone
With all the water, slippery surfaces, and medicines, the bathroom is a high-risk area. Your main goal here is simple: prevent unsupervised access and lock up anything harmful.
Start with the toilet. A curious toddler can easily lift that lid, and an open toilet presents a very real drowning risk. A simple toilet lid lock is an essential, easy-to-install device.
Next, tackle the medicine cabinet. Even if it’s mounted high on the wall, don’t take any chances. All medications, vitamins, and even toiletries should be stored in a cabinet secured with a childproof latch. Don't forget that things like mouthwash can be toxic if a child drinks it.
Bath time itself requires its own set of precautions.
- Set a Safe Water Temperature: To prevent serious scalding burns, set your home's water heater to 120°F (49°C) or lower. You can also buy an anti-scald device that fits right onto the faucet.
- Use Non-Slip Surfaces: A non-slip mat inside the tub is a must for preventing falls during splashy playtime. I also recommend a soft, cushioned cover for the bath spout to protect against head bumps.
- Never Leave a Child Unattended: This is the golden rule. A child can drown in just a few inches of water in seconds. Never, ever leave them alone in the tub—not even for a moment.
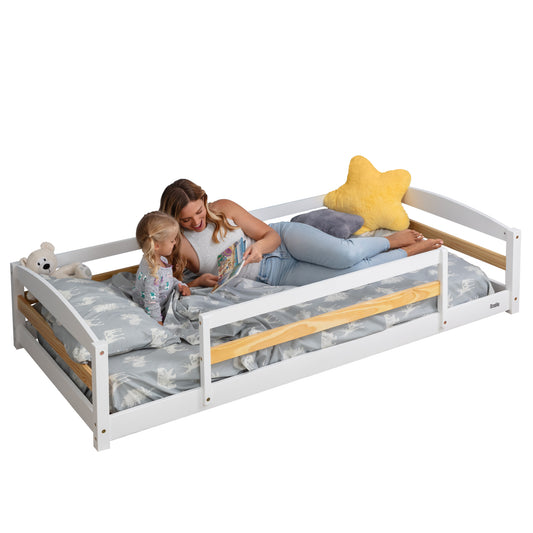
Childproofing the Bedroom and Nursery
A child's bedroom should be their sanctuary for rest and play. When you’re childproofing this space, the main focus is on creating a safe sleep environment and getting rid of any climbing or choking hazards.
In the nursery, crib safety is everything. The crib needs a firm mattress with a tight-fitting sheet, and that's it. No pillows, no loose blankets, no bumpers, and no stuffed animals. All of these soft items are a suffocation risk for infants. As your child gets older, you'll start thinking about what comes next. Many parents find that looking into the floor bed vs crib debate helps them figure out the safest and best choice for their family's philosophy.
While you're checking the room, pay special attention to the windows. The long, dangling cords on older blinds are a major strangulation hazard. The best solution is to invest in cordless child-proof window blinds, but you can also use cord winders to wrap any loose cords up tightly and keep them well out of reach.
Just like in the living room, all heavy furniture in the bedroom—especially dressers and changing tables—must be securely anchored to the wall. This is a space where children often spend time alone during naps or quiet play, making furniture stability absolutely crucial.
Finally, do a thorough sweep for any small objects that could become choking hazards. Get on the floor and check under the crib, dig through toy bins, and scan low shelves. If an item can fit inside a toilet paper tube, it’s a choking hazard. Keeping the floor clear and organized is one of the most important parts of maintaining a safe space.
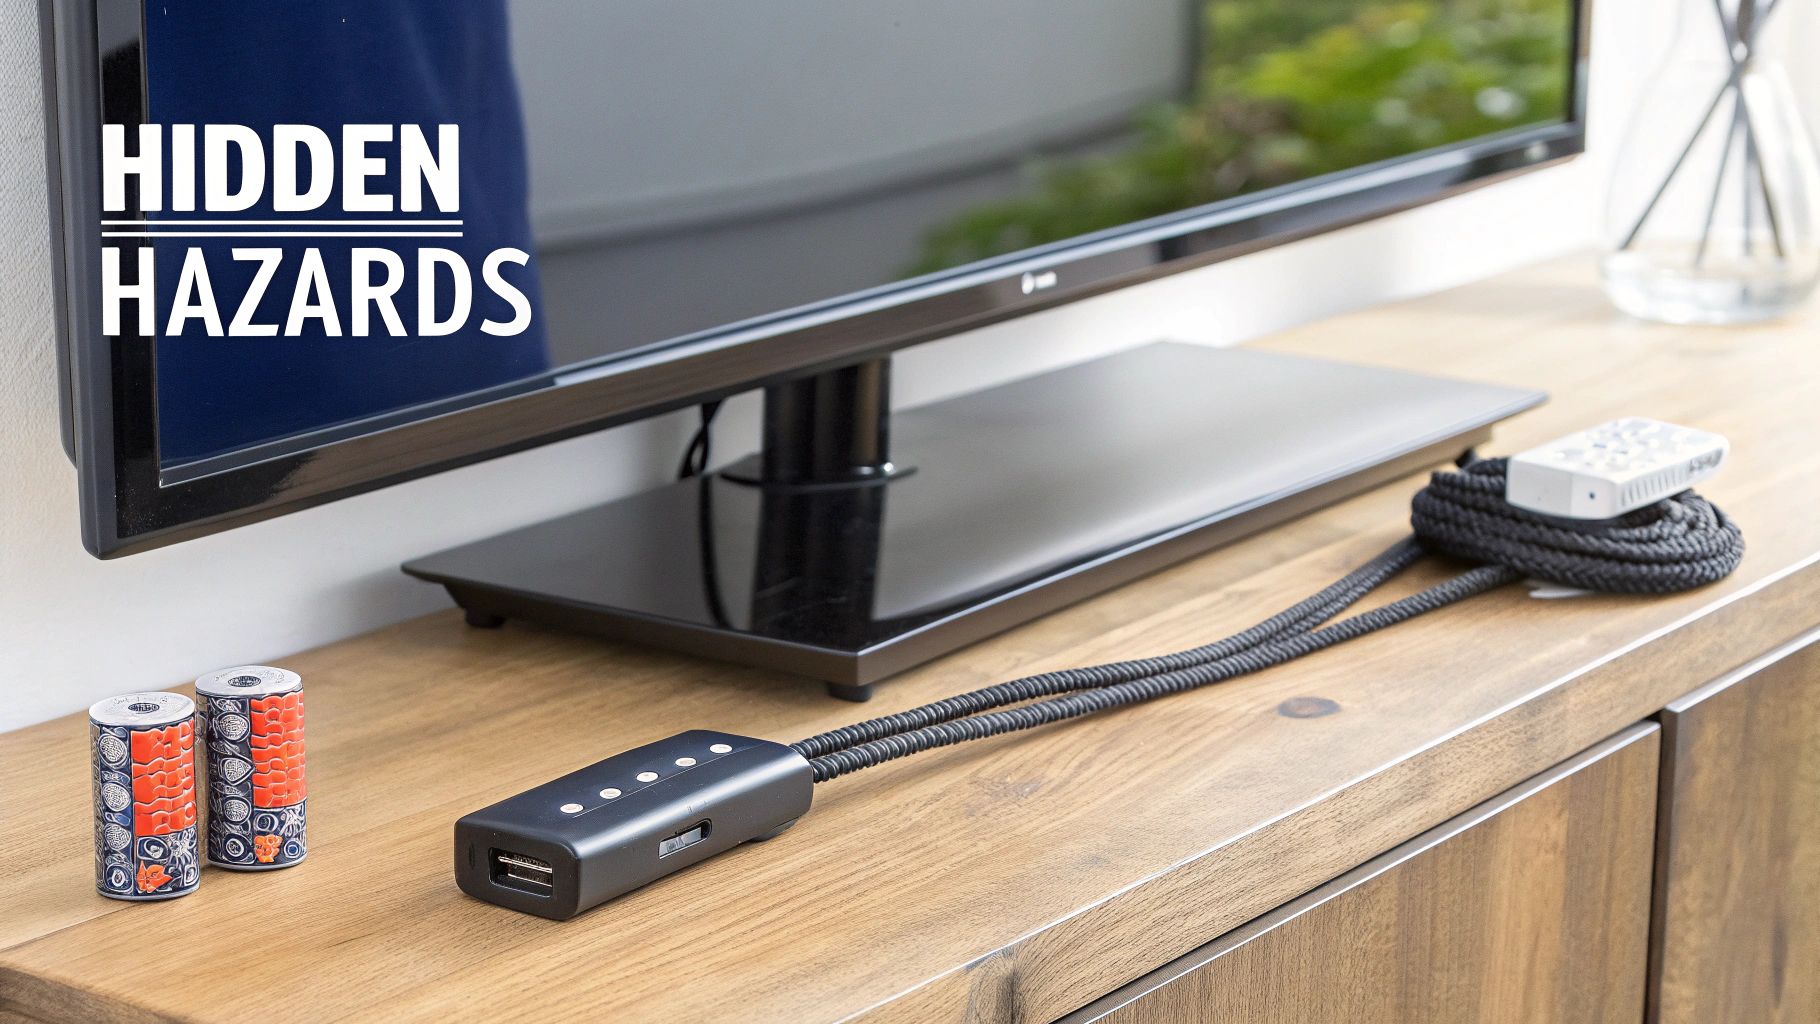
Uncovering Hidden Dangers Most Parents Overlook
You've done the rounds. Outlets are covered, cabinet locks are installed, and the stair gate is firmly in place. While those are the big-ticket items on every childproofing list, a truly safe home means training your eyes to spot the less obvious hazards.
These are the dangers lurking in plain sight, the everyday items that don't scream "risk" until it's too late. Going beyond the basic checklist is what separates a good safety plan from a great one, especially as your little one gets more mobile and curious.
Let’s pull back the curtain on some of the most overlooked hazards and talk about simple, effective ways to handle them.
The Silent Threat of Window Blind Cords
Long, dangling cords from blinds and curtains are one of the most serious and underestimated strangulation risks in any home. To a toddler, that looped cord is just a fascinating toy to pull on or a fun necklace to try on. It can become dangerously tight in seconds. This one is non-negotiable.
The absolute best fix is to replace corded window treatments with cordless ones. If that's not in the budget right now, you still have to secure the cords you have.
- Install Cord Cleats: These are cheap, easy to install, and let you wrap the excess cord tightly and high up on the window frame.
- Use Cord Winders: These little gadgets coil the cord inside a case, keeping it completely out of reach.
- Move Furniture Away: Make sure cribs, beds, chairs—anything climbable—are positioned far from windows so your child can't get near the cords in the first place.
Unsecured Furniture and Electronics
You know to anchor the big stuff like bookshelves and dressers. But what about that sleek, flat-screen TV? Modern TVs are incredibly top-heavy and surprisingly easy for a determined toddler to pull over. Anchoring the TV to the wall or using anti-tip straps to secure it to a media stand is just as critical as securing a heavy bookcase.
And it doesn't stop with the TV. Take a walk through your house and think like a tiny mountain climber.
A child’s ability to use leverage is often much greater than parents expect. A seemingly sturdy floor lamp, a coat rack, or even a tall, decorative plant can become a tip-over risk when a little one tries to pull themselves up.
Give these items a gentle push. If they wobble at all, secure them or move them somewhere your child can't access.
Tiny Items with Big Consequences
Some of the most dangerous things in your home are small enough to get lost in the couch cushions. Button batteries, for instance. They're in everything from remote controls and key fobs to those musical greeting cards from grandma. If swallowed, these tiny power cells can cause severe, life-threatening chemical burns in just a couple of hours.
- Secure Battery Compartments: A small piece of strong tape over the compartment latch can be enough to thwart curious fingers.
- Store Spares Safely: Keep spare button batteries locked up, just like you would with medication.
- Dispose of Old Batteries Properly: Wrap used batteries in tape before taking them to a designated recycling center.
This level of vigilance also applies to other small hazards: loose magnets on the fridge, dropped pins or screws, and even pet food, which is a perfect choking size for a crawling baby.
Water Dangers Beyond the Bath
Most parents are on high alert during bathtime, but water hazards are found all over the house. A toddler can drown in as little as one inch of water. That means you need to look at water sources you might not have considered before.
Keep an eye out for these risks:
- Pet Water Bowls: A crawling baby will make a beeline for the dog's water dish. Keep it in a room your child can't access, or only put it down when your pet is eating or drinking.
- Buckets: A mop bucket with even a little bit of leftover water is a huge drowning risk. Always, always empty them immediately after use.
- Toilets: Keep bathroom doors shut and install toilet lid locks. It's a simple fix that removes a major hazard.
Understanding the full scope of potential falls is also critical. Global statistics reveal that falls are the most common type of injury for young children. Alarmingly, about 70% of parents report never using window guards or stops, despite an average of eight children under five dying each year from window falls. To learn more about these findings and other home safety statistics, you can read the full research about protecting children at home.
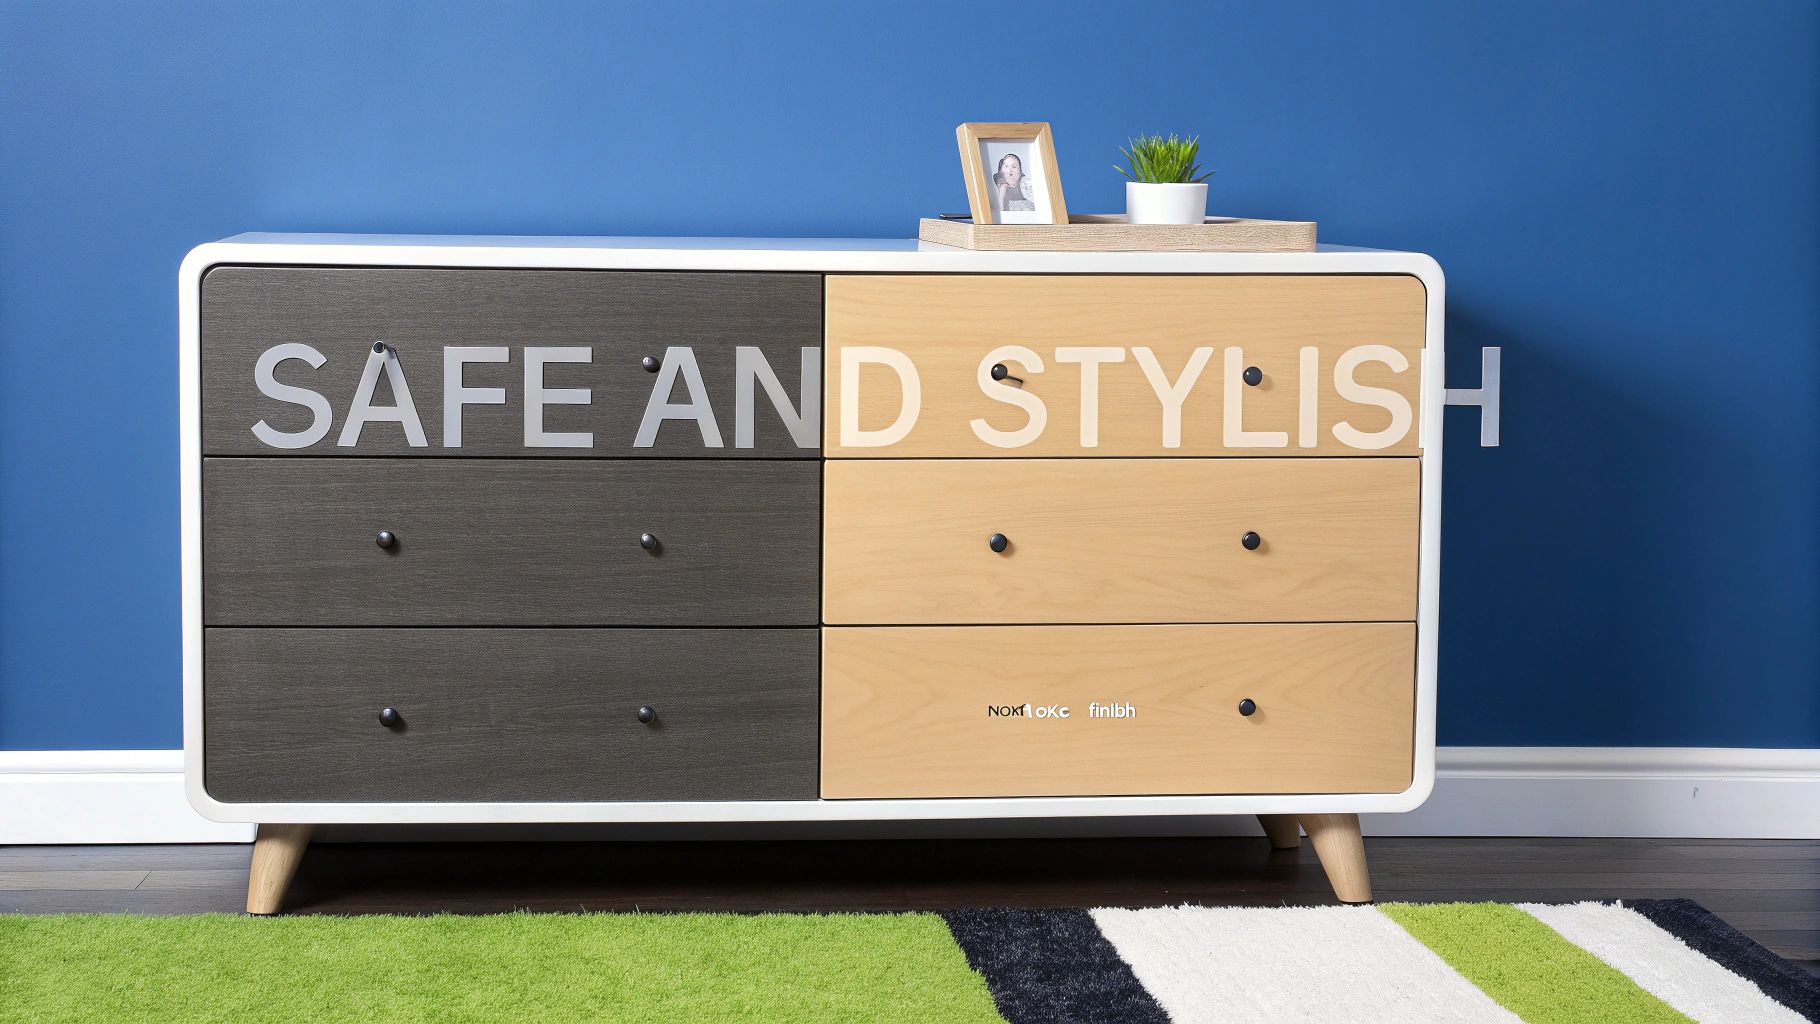
Choosing Furniture That's Both Safe and Stylish
Let's be honest, furniture is often the biggest safety minefield in a room full of curious kids. Anchoring the big stuff is non-negotiable, but the absolute best strategy is to pick pieces that are safe by design, not just patched up with safety gadgets after the fact.
When you think about safety from the very beginning, you can build a space that feels secure without looking like a fortress of foam bumpers and plastic locks. It’s all about being intentional and choosing furniture with construction, materials, and designs that naturally cut down the risk.
What to Look for in Child-Safe Furniture
Whether you're buying something new or giving your current furniture a critical eye, there are a few specific things to look for. These details are less about style and more about preventing those all-too-common bumps, tumbles, and worse.
A great shortcut is to look for the JPMA (Juvenile Products Manufacturers Association) seal. This tells you a product has met some high safety standards. But even without a seal, you can train your own eye to spot a safe design.
Here’s what to prioritize:
- Rounded Corners and Edges: Sharp corners on coffee tables, dressers, and nightstands are just waiting for a toddler to run into them. Furniture with smooth, rounded edges completely sidesteps this problem.
- Low-Profile and Sturdy Base: A low center of gravity is your best friend when it comes to preventing tip-overs. Look for pieces that are wide and squat rather than tall and skinny—they’re just naturally more stable.
- Non-Toxic Finishes: Kids explore with their mouths. It's just a fact of life. That makes the materials in your home incredibly important. Always opt for furniture with non-toxic, lead-free paints and finishes. Getting familiar with non-toxic kids' furniture can give you some serious peace of mind.
These features aren't just for specialty "kid" furniture anymore. Lots of modern designs use these principles, so you can easily blend safety right into your home's decor.
Choosing furniture with built-in safety features is a proactive strategy. Instead of reacting to hazards with add-on products, you're designing a space where those hazards don't exist in the first place.
When you're shopping for new furniture or just trying to figure out if your current pieces are safe enough, a quick checklist can make all the difference.
Safety Checklist for Children's Furniture
| Safety Feature | What to Look For | Why It's Important |
|---|---|---|
| Stability | A wide, sturdy base. The furniture shouldn't wobble or feel top-heavy. | Prevents dangerous and potentially fatal tip-over accidents. |
| Edges & Corners | Smooth, rounded, or curved edges instead of sharp, 90-degree angles. | Reduces the risk of cuts, scrapes, and serious head injuries from falls. |
| Materials & Finish | Solid wood or durable materials with non-toxic, lead-free paint and finishes. | Ensures the furniture is sturdy and safe if a child chews or licks it. |
| Drawer Safety | Soft-close mechanisms and drawer stops that prevent them from being pulled out all the way. | Protects little fingers from getting pinched or crushed. |
| Handles & Knobs | Recessed or cut-out handles instead of small knobs or pulls. | Eliminates choking hazards and prevents snagging on clothing. |
Using a simple guide like this can help you quickly assess any piece of furniture, ensuring it's a safe addition to your home.
Smart Designs That Prevent Common Accidents
Beyond the basics, some brands are getting really clever with features designed specifically to protect little ones. These thoughtful details can make a huge difference in your day-to-day.
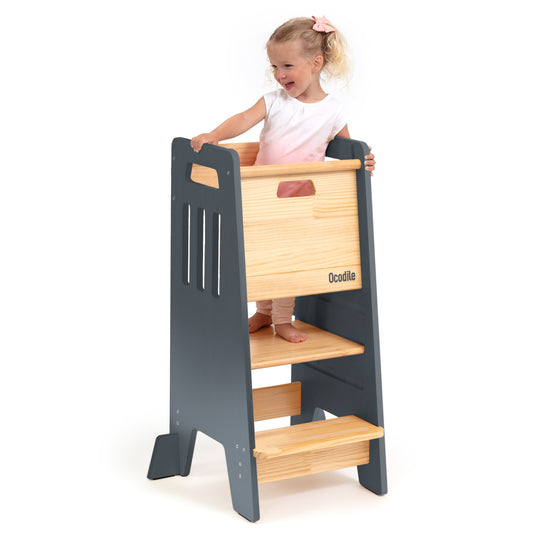
For instance, Ocodile’s line of kid-friendly furniture is a perfect example of this in action. Their pieces are clearly crafted by people who understand how kids actually move and play in a space.
Look for smart features like:
- Soft-Close Drawers: This simple touch stops drawers from slamming shut, saving countless tiny fingers from painful pinches.
- Cut-Out Handles: Instead of knobs that can be a snag hazard (or a tempting foothold for a climber), recessed handles are a much safer bet.
- Solid Wood Construction: Furniture made from solid wood is heavier and way more durable. That means it’s far less likely to tip over or break, even with a little one using it as a jungle gym.
When you prioritize features like these, you end up with furniture that not only looks great but actively makes your home a safer place. It’s a framework that helps you see the risks in your current setup and make much smarter choices down the road.
Your Childproofing Plan Needs to Grow Up, Too
Let's be honest, childproofing isn't a "set it and forget it" project. The safety measures that worked wonders for your crawling infant will seem like a quaint memory once you have a determined toddler who can climb, solve puzzles, and reach things you never thought possible.
Staying one step ahead of your child's next big developmental leap is the name of the game. This means your safety plan has to be a living, breathing thing that you constantly adapt. It’s all about regular checks, smart installations, and evolving your strategy as your little one’s abilities blossom.
Installation and Maintenance: The Nitty-Gritty Details
A safety device is only as good as its installation. I see this all the time with baby gates. A pressure-mounted gate is fantastic for blocking off a hallway, but it’s a recipe for disaster at the top of a staircase. One good push from a determined toddler could send the whole thing tumbling down.
For stairways, you absolutely need a hardware-mounted gate that screws securely into the wall. No exceptions.
Once everything is installed, the real work begins. I recommend doing quick weekly checks on all your gear. It only takes a few minutes.
- Shake Your Gates: Give your baby gates a firm wiggle. Are the screws loose? Is the pressure still tight enough?
- Test Cabinet Locks: Yank on those secured drawers and cabinets. Make sure the latches still catch properly and haven't slipped out of alignment.
- Check Outlet Covers: Are all outlet covers still sitting snugly in the wall? Little fingers are surprisingly good at prying them loose.
- Inspect Furniture Anchors: Pull on your dressers and bookshelves. The anti-tip straps should be taut and firmly attached to both the furniture and the wall.
Evolving Your Strategy as Your Child Grows
Your safety plan has to keep up with your child's ever-expanding list of skills. The moment they go from crawling to pulling themselves up, your focus needs to shift to a whole new set of potential hazards.
Childproofing is a moving target. What secured your home yesterday might not be enough for the new skill your toddler mastered this morning. The goal is to anticipate their next move and adjust your environment accordingly.
This means you constantly have to get on their level and re-evaluate your home through their eyes. What looks like a boring end table to you might look like the perfect ladder to them.
From Toddlerhood to the Preschool Years
As your baby blossoms into a toddler, their problem-solving skills will start to challenge your initial safeguards. They might figure out how to work a simple latch or use a toy to boost themselves over a barrier. This is your cue to level up your safety measures and start teaching some basic safety rules.
- When they start climbing: Everything changes. Can they use dresser drawers as a makeshift ladder? Is the coffee table now a launchpad to the sofa? You might even need to temporarily remove certain pieces of furniture.
- When they can open doors: Doorknob covers are a must-have for bathrooms, laundry rooms, and exterior doors. This is a simple way to keep them away from water hazards and cleaning chemicals.
- As they understand more: You can start teaching simple concepts like "hot" for the stove or "yucky" for cleaning supplies. This doesn't replace physical barriers, of course, but it helps build a foundation of safety awareness.
We saw just how important this adaptive approach is during recent years. A study found that a whopping 42.3% of parents added extra childproofing measures during lockdown periods. It turns out, parents of kids under five were almost twice as likely to beef up their home safety. You can find more details in this NIH study about how family time influences home safety practices. It's a great reminder that your plan needs to adapt not just to your child's age, but to your family's changing circumstances, too.
Your Action Plan for a Safer Home
Alright, let's pull all of this together. It's easy to get overwhelmed, but remember the goal here isn't to turn your home into a fortress. It's about creating a thoughtfully designed space where your little one has the freedom to explore, learn, and thrive—safely.
Your whole strategy really boils down to three things we've talked about. First, get proactive and see the world from their level. Next, break it down and tackle your home one room at a time so it feels manageable. Finally, stay on your toes and adapt your plan as your child hits new milestones and masters new skills.
Turning Knowledge into Action
To help you get started right away, we've put all this information into a simple, practical tool. Think of this checklist as your road map.
Taking these steps is how you build a true safe haven for your family—a place where curiosity is encouraged because the biggest risks have already been handled.
As you're making your plan, don't forget the big-picture safety systems that go beyond just locks and latches. For instance, comprehensive fire safety is a must. Taking a moment to understand the local requirements for things like interconnected smoke alarms in QLD is a critical part of your overall home safety plan.
Now you're ready to put everything into motion. Download our Ultimate Home Childproofing Checklist below and start transforming your home into the safest possible space for your little one to grow.
Answering Your Top Childproofing Questions
As you get ready to make your home safer for your little one, a few questions always seem to pop up. Let's tackle some of the most common ones I hear from parents, because getting clear answers can make this whole process feel way less daunting.
When Should I Actually Start Childproofing?
The sooner, the better. Ideally, you’ll want to start before your baby is even mobile. Think during the second trimester of your pregnancy or when your little one is around 3-4 months old.
Getting a head start on the big jobs, like anchoring furniture, means you won't be scrambling to do it while chasing a brand-new crawler. Focus on the most critical hazards first, and then you can add more layers of protection as they get bigger and more curious.
Can I Childproof My Home Without It Looking Like a Fortress?
Absolutely. Gone are the days of clunky, ugly safety gear. Modern childproofing products are designed to blend right in with your home's decor.
Today’s childproofing solutions are all about blending in. You can maintain your home’s style while creating a secure environment for your child to explore safely.
Look for magnetic cabinet locks that are installed on the inside, leaving your cabinet faces completely clean. Clear corner guards are practically invisible, and retractable baby gates just disappear when you don't need them. Another great trick is to choose furniture that already has safety built into its design.
What Are the Best Options if I'm Renting?
Don't worry, you have plenty of great, damage-free options.
- Pressure-mounted baby gates are perfect for doorways and hallways. Just remember: never, ever use a pressure-mounted gate at the top of the stairs.
- Adhesive-based cabinet locks and drawer latches are your best friend. Most can be removed later without a trace.
- Outlet plugs are simple, effective, and leave no marks behind.
- You can even find furniture anti-tip straps that use powerful adhesives instead of screws, keeping your walls (and your security deposit) safe.
For furniture that is safe by design, explore the child-friendly collections from Ocodile. Our pieces are crafted with built-in safety features to give you peace of mind. Explore Ocodile's safe furniture