



1 Inch Pipe Clamp Guide for Child-Safe DIY Furniture
You're halfway through a weekend project, the toddler learning tower is on the floor, and the last missing piece is the hardware that keeps the pipes steady without wobble. That's where a 1 inch pipe clamp enters the picture, but the label can mislead fast if you treat “1 inch” as a simple promise instead of a sizing clue. The real job is to match the clamp to the pipe's actual fit, the material around it, and the kind of stress the furniture will see in a family home.
Introduction to 1 Inch Pipe Clamps
Pipe clamps aren't a modern invention that popped out of a hardware catalog. Greek builders used hammered copper rings as early as 500 BC to secure hoses for water transport and firefighting, and the modern single-ear clamp was invented in 1951 by Hans Oetiker (historical clamp progression). That long history matters because the basic problem hasn't changed, keeping a tube or pipe held safely in place without damage.
For parents building child-height furniture, the stakes are practical, not abstract. A clamp that's too loose can let a handrail twist, while one that's too aggressive can mark or deform the pipe, which is the last thing you want on a piece your child will grab every day. The smartest approach is to treat the clamp like a fitted shoe, not a one-size accessory.
Practical rule: start with the pipe standard, then choose the clamp. If you reverse that order, you'll spend more time fighting the fit than finishing the project.
Core Concepts of Clamp Sizing and Fit
A 1 inch pipe clamp sounds obvious until you measure the pipe and realize the number on the label doesn't always describe the dimension you're touching. In many cases, the clamp is specified by the inside diameter, or ID, of the pipe or hose it fits, not by the outside diameter (ID versus OD sizing). That matters because a nominal 1-inch pipe can have a much larger outside diameter, so the clamp has to match the actual bore, not the printed name.
Consider the analogy of a sleeve and a broom handle. The sleeve's tag might say “medium,” but what matters is whether the handle slides in with the right amount of grip. With pipe clamps, the same logic applies, except the wrong fit can mean slipping, crushing, or a wobbly joint instead of a stretched seam.

A simple buying checklist keeps the confusion down:
- Measure the pipe twice: Measure the pipe or hose you are clamping, not just the label on the supply list.
- Check the fit standard: A nominal size can hide a different outside diameter depending on the pipe type.
- Match the clamp opening to the pipe: The clamp has to close around the actual dimension, not a guessed one.
- Watch for material mismatch: The clamp and pipe should work together, or corrosion and loosening become more likely.
If you're comparing clamp styles, the main question is whether you need a gentle grip, a rigid hold, or a strap-style fastener that can be adjusted in small steps. That decision becomes much easier once you stop reading “1 inch” as a universal measurement and start reading it as a compatibility clue.
Key Materials and Types of 1 Inch Pipe Clamps
The clamp style you choose changes how the furniture feels in use. A saddle clip can hold a pipe neatly, a U-bolt gives a firm wraparound grip, a worm-drive clamp offers easy adjustment, and a cushioned clamp helps reduce vibration where pipes might tap against wood or metal. For child-focused furniture, that last detail matters because a quiet, padded connection tends to feel more finished and less harsh in daily use.
Material choice matters just as much as shape. In a family room, a clamp that resists corrosion and doesn't leave sharp edges or flaky finishes is usually the safer long-term choice. In damp or washdown-prone spaces, 316 stainless steel stands out because it's designed for tougher corrosion conditions, and that's especially relevant when the clamp will stay visible and reachable on furniture or framing.
For a corrosion-prone setup, a 1 inch parallel clamp made from 316 stainless steel is designed to secure rigid or PVC-coated conduit parallel to the flange of I-beams or channel without drilling holes, which preserves the structure and supports consistent alignment along steel framing (316 stainless parallel clamp). That no-drill feature is useful in furniture builds too, because you can keep the frame cleaner and avoid unnecessary weakening where the pipe meets the support.

The main trade-offs are straightforward:
- Saddle Clip: good for a tidy, secure hold, but it gives you less alignment flexibility.
- U-Bolt: strong and familiar, but metal-to-metal setups can become less forgiving if the fit is off.
- Worm-Drive Clamp: adjustable and easy to fine-tune, but material choice matters because corrosion can show up sooner in poor conditions.
- Cushioned Clamp: friendlier around vibration and scratching, but it's not the answer for every heat or load situation.
The best materials for kids' furniture are the ones that stay stable, resist rust, and don't punish you during assembly. If the clamp will be visible, touched often, or exposed to moisture, that should push you toward a cleaner finish and a corrosion-resistant option.
How to Choose the Right Clamp for Plumbing and Furniture Projects
The biggest mistake is buying by name instead of by fit. Guidance on pipe clamps keeps repeating the same caution for a reason, the outside diameter and material compatibility matter, and you should measure twice, avoid overtightening, and match clamp material to the pipe to reduce corrosion risk (pipe clamp buying guidance). That advice is just as important for a child's bench or learning tower as it is for a plumbing repair, because a bad clamp can loosen, mar the surface, or slowly chew into the pipe.
The easiest way to choose is to work from use case first. A plumbing line that stays hidden can tolerate a different clamp style than a furniture leg that your child will touch every day. If you need a general troubleshooting resource for pipe damage before or after a clamp swap, sealing a dripping pipe is a practical place to start looking at the surrounding problem, not just the clamp itself.
A quick decision filter helps:
- Dry indoor furniture: choose a clamp that stays clean, doesn't snag clothing, and won't rust from ordinary humidity.
- Damp or exposed builds: lean toward corrosion-resistant metal, especially where cleaning or spills are routine.
- PVC, copper, or EMT conduit: verify material compatibility before tightening, because the wrong pairing can mark the pipe or shorten the clamp's life.
- Static load versus movement: if the joint doesn't move much, focus on steady grip. If it vibrates or gets bumped, look for padding or a more forgiving clamp body.
For parents, the safest hardware choice usually looks boring. It's the clamp that disappears into the project and keeps doing its job while little hands tug, climb, and lean on the finished piece.

If you're dealing with plumbing that's more serious than a simple furniture build, Contact Stultz Plumbing for repiping can make sense when the underlying line needs a broader fix instead of a hardware patch.
Real World Use Cases and Examples
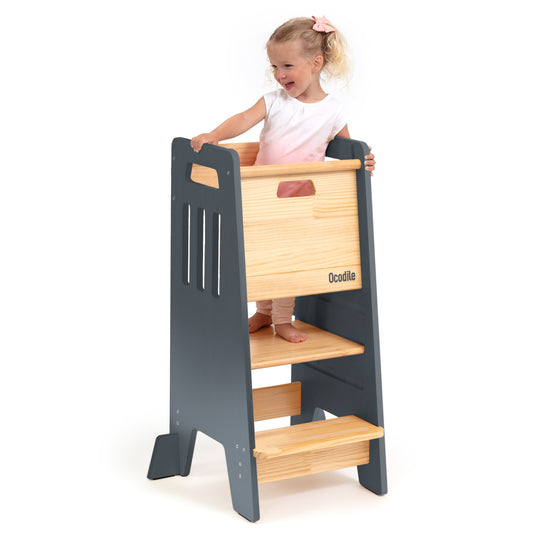
A parent building a toddler learning tower often starts with a simple goal, keep the rails steady and the look clean. In that kind of build, a cushioned or neatly finished clamp makes sense because the child will be right up against the structure, and nobody wants a sharp or rattly connection at hand height. The most useful habit is to dry-fit the frame first, then clamp gently, then test for wobble before the final tightening.
Another family project might be a mudroom bench with pipe legs and a wood seat. In that case, a builder may choose a more rigid clamp where the pipe meets the frame, then add padding or wrap at contact points to help prevent scratches and reduce vibration. A good visual reference for compact furniture piping ideas can be useful here, especially when you're trying to balance utility with a softer home look, like the examples in these 10 PVC pipe furniture ideas.
One simple lesson shows up in both projects, the clamp should support the design, not fight it. If the pipe is part of a child-accessible structure, smooth edges and predictable grip matter more than any flashy hardware feature. If the pipe is hidden inside a bench or support frame, you can prioritize stability and corrosion resistance a little more heavily.
A clean build usually comes from boring hardware choices made carefully. The visible result looks simple because the hidden fit was checked patiently.
Installation Best Practices and Common Mistakes
The most common installation mistake is uneven tightening. One side of the clamp takes the load first, the pipe shifts slightly, and the joint ends up stressed before the furniture even sees daily use. On a child's piece, that can create a weak point you won't notice until someone leans on it.
A better routine is slower, but it pays off. Start by aligning the pipe and frame, then snug the clamp in small steps so the joint closes evenly. If the clamp or pipe is metal and likely to see repeated adjustment, a small amount of anti-seize on the threads can make later changes easier, while a rubber cushion helps where the pipe needs protection from hard contact.

A few habits keep the build safer:
- Use the right tool: a screwdriver can work for some clamps, but the tool should fit cleanly and not slip.
- Tighten gradually: don't crank down all at once, because pipe deformation starts with overcorrection.
- Inspect the contact point: if the pipe shows a shiny pinch mark, back off and rethink padding or clamp style.
- Recheck after assembly: furniture settles a little, and a quick second look catches anything that moved.
The clearest rule is simple, don't use force to compensate for a bad fit. If the hardware feels wrong before tightening, it usually is. A careful installer saves the finish, protects the pipe, and gives the child a sturdier piece to use.
Alternatives and Compatibility Notes for DIY Family Furniture
Not every family project needs a metal clamp. Lightweight temporary holds can sometimes use plastic straps or other non-permanent fastening ideas, but those are best treated as placeholders, not final hardware for child-use furniture. If you're mixing standards, the safest move is to verify the pipe type before you buy anything, because a clamp labeled for one system may not fit another.
That compatibility issue shows up clearly in strut systems. A product labeled 1" IPS is identified as 1.375" outside diameter and is stated to fit 1" EMT, rigid, and IMC conduits, which means engineers check the pipe standard first because nominal sizes vary by type (1" IPS sizing in strut systems). For a parent, the lesson is simple, the nominal label is not enough, and a hardware-store guess can waste time or create a loose joint.
Use this as a final filter before you buy:
- Choose metal clamps when the furniture needs real structural support.
- Use softer or cushioned contact points when the child's hands will regularly touch the hardware.
- Verify the pipe standard first if the pipe came from a plumbing aisle, electrical aisle, or furniture project kit.
- Reject anything that forces a bad fit just because the label looks close enough.
The goal is not to find the most complicated clamp. It's to choose the one that fits the pipe, protects the material, and keeps the finished piece calm, stable, and easy to live with.
If you're planning a child-safe furniture build and want to keep the hardware choices simple, sturdy, and well matched to real-world use, visit Ocodile for more ideas that fit family life.