


10 Essential Fine Motor Skills Development Activities for Thriving Kids in 2026
Welcome to our comprehensive guide on nurturing one of the most critical aspects of early childhood development: fine motor skills. These small, precise movements involving the hands, fingers, and wrists are the foundational building blocks for countless future abilities, from writing their name and tying their shoes to buttoning a coat and using utensils.
Strong fine motor skills are directly linked to a child's growing independence, problem-solving abilities, and overall confidence. Developing this dexterity doesn't happen by accident; it requires intentional, engaging, and joyful practice. That’s why we've compiled a detailed list of ten powerful fine motor skills development activities designed to be both effective and deeply engaging for young children.
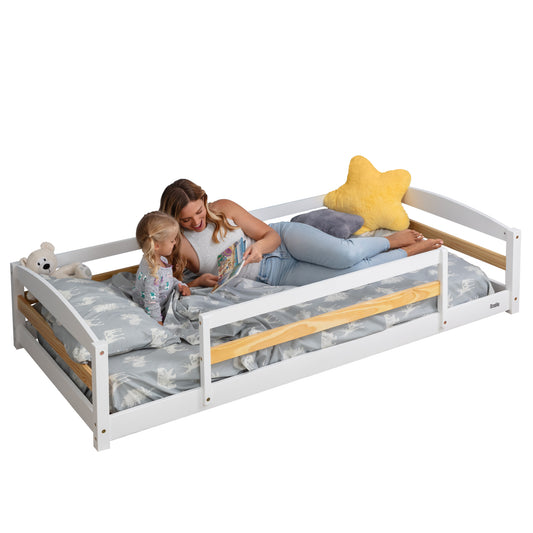
In this guide, you will find practical, age-appropriate activities broken down with step-by-step instructions. We will explore everything from pouring and transferring to beading, cutting, and pre-writing exercises. We’ll also show you how to integrate core Montessori principles and supportive furniture, like Ocodile's standing towers and floor beds, to create a rich learning environment that transforms everyday moments into opportunities for growth. Understanding the importance of these skills is a key part of early education, and exploring resources on preparing your toddler for preschool can offer additional insights into school readiness. Let's begin building those essential skills, one playful movement at a time.
1. Pouring and Transferring Activities
Pouring and transferring are foundational Montessori-inspired activities that involve moving materials, such as water, sand, or beans, from one container to another. These seemingly simple tasks are powerhouse fine motor skills development activities, teaching children to grade their movements, coordinate their hands and eyes, and build significant wrist and hand strength. The focus is on the process, allowing a child to repeat the action and achieve mastery at their own pace.
This activity directly supports a child's growing independence. By learning to pour water into a cup or transfer pasta into a bowl, they are practicing essential practical life skills used daily. This builds confidence and a sense of capability, showing them they can actively participate in family routines like meal preparation and self-care.
How to Implement Pouring and Transferring
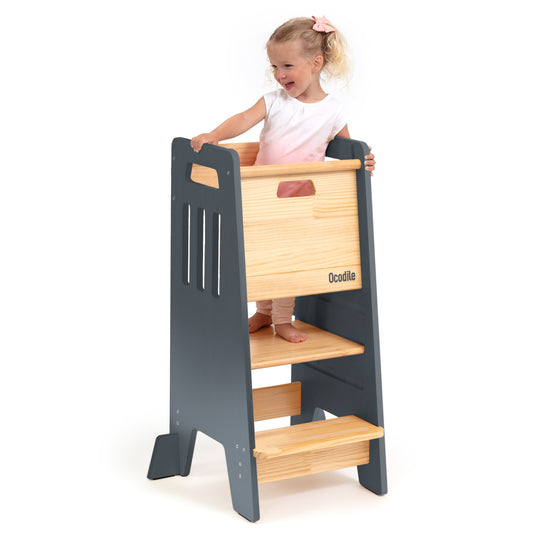
Setting up a dedicated station is key to success. A child-sized table or a sturdy learning tower, like an Ocodile standing tower, brings the child to the perfect height at a kitchen counter, promoting proper posture and control.
- Start Simple: Begin with dry, large materials like pom-poms or large pasta shapes. Provide two identical bowls and show your child how to transfer them from one to another using their hands.
- Introduce Tools: Once they master hand transfers, introduce tools like scoops or large spoons. Progress to smaller dry goods like rice or lentils, which require more precise movements.
- Transition to Liquids: Finally, introduce water. Start with a small pitcher and two cups on a tray to contain spills. Show them how to hold the pitcher with two hands and pour slowly.
Key Insight: The goal isn't just to move materials without spilling; it's to develop concentration and control. Spills are learning opportunities, not failures. Placing a small sponge nearby empowers the child to manage their own cleanup, adding another layer of practical skill development.
Tips for Success and Variations
To keep the activity engaging and appropriately challenging, consider these adjustments:
- Vary the Containers: Use containers with different-sized openings, like a wide bowl and a narrow-necked bottle with a funnel.
- Change the Materials: Alternate between dry and wet materials to challenge different muscle groups and sensory systems.
- Incorporate Color: Add a drop of food coloring to water for a visually engaging pouring experience.
Always ensure the materials are non-toxic and age-appropriate. This activity is perfect for toddlers and preschoolers who are eager to mimic adult actions and gain physical independence.
2. Beading and Threading Activities
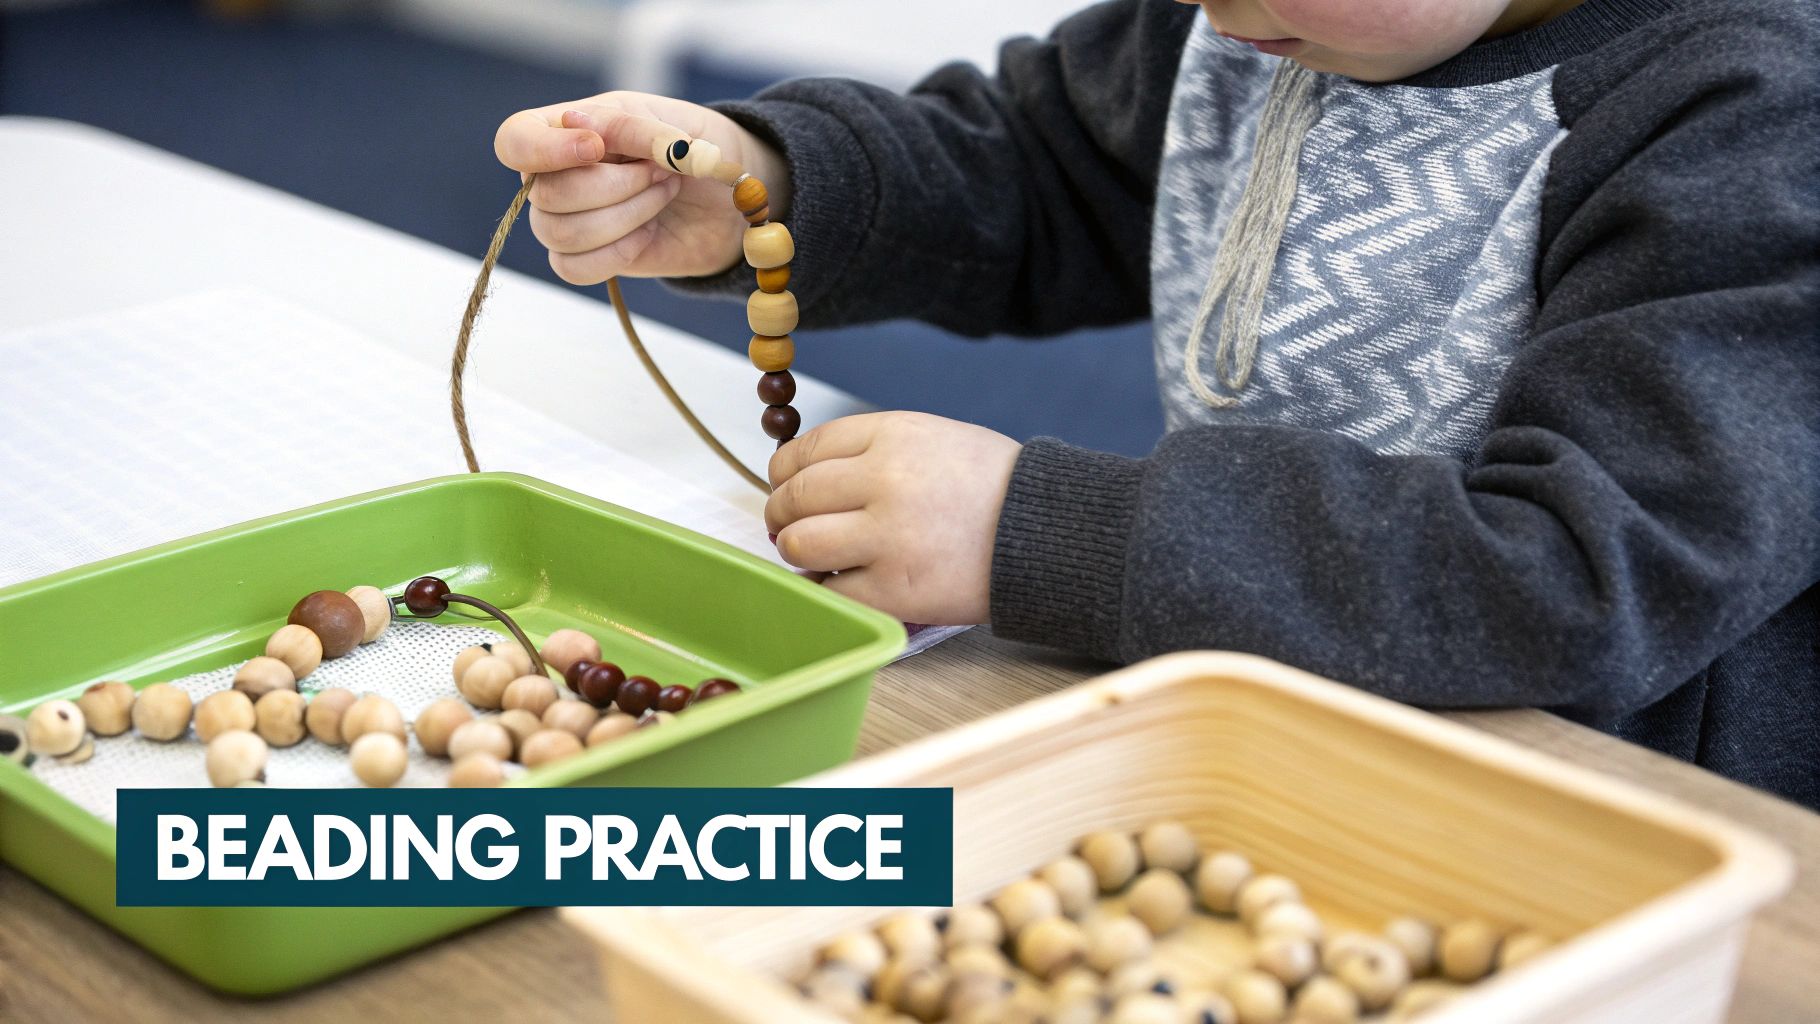
Beading and threading involve stringing items like beads onto yarn, pipe cleaners, or specialized cords. These activities are exceptional for building precision and dexterity, making them powerful fine motor skills development activities. They demand a high level of hand-eye coordination, strengthen the pincer grasp (using the thumb and forefinger), and encourage bilateral coordination as one hand holds the string while the other manipulates the bead. The process of completing a pattern or a piece of jewelry offers a tangible sense of accomplishment, boosting a child’s confidence.
This activity directly enhances cognitive skills like pattern recognition and sequencing, which are precursors to mathematical thinking and reading. Creating a personalized bracelet for a friend or a decorative string for their room gives children a meaningful outlet for their creativity. This purposeful work is a core tenet of Montessori education, where activities have a clear beginning, middle, and end, fostering concentration and a sense of order.
How to Implement Beading and Threading
A dedicated, organized workspace is crucial for this focused task. Setting up on a low table or using a standing tower at a counter provides a stable surface and helps contain the small pieces. An Ocodile standing tower can create the perfect ergonomic station, preventing fatigue and allowing the child to focus fully on the intricate movements required.
- Start Large: Begin with large, easy-to-grasp materials. Think big wooden beads, large-hole pasta shapes (like penne), or even cut-up paper towel rolls. Use stiff threading materials like pipe cleaners or shoelaces with aglets to make the initial process less frustrating.
- Introduce Patterns: Once your child is comfortable with the basic motion, introduce simple patterns. You can create visual pattern cards (e.g., red bead, blue bead, red bead) for them to follow, adding a cognitive challenge.
- Increase Complexity: Gradually introduce smaller beads and more flexible threading materials like yarn or lacing cord. A blunt-tipped darning needle can be introduced for older children who have developed sufficient control.
Key Insight: The focus is on the development of precise, controlled movements and sustained attention, not on creating a perfect product. A shallow tray or a mat with a raised edge is essential to contain beads, reducing frustration from rolling and empowering the child to manage their own workspace.
Tips for Success and Variations
To keep the activity fresh and to scale the difficulty appropriately, try these variations:
- Natural Materials: Go on a nature walk and collect items with natural holes, like certain leaves, small twigs, or shells, to thread onto twine.
- Edible Fun: Use edible items like circular cereals or candies to thread onto licorice strings for a fun, snackable activity.
- Vary the Thread: Experiment with different threading materials, from pipe cleaners and straws to yarn and ribbon, each offering a unique tactile experience and challenge.
Always supervise young children closely, especially when using small beads, to prevent any choking hazards. This activity is ideal for preschoolers and older children who are ready to engage in more detailed, focused work that yields a beautiful, self-made result.
3. Cutting and Scissor Skills Development
Using scissors is a complex task that represents a significant milestone in fine motor skills development activities. It requires children to open and close their hands with precision, coordinate both hands simultaneously, and track a line with their eyes. This activity strengthens the small muscles in the hand, known as intrinsic muscles, which are crucial for pencil grip and writing stamina later on.
This skill also enhances bilateral coordination, as one hand must stabilize the paper while the other manipulates the scissors. Successfully cutting out a shape or along a line gives children a tangible sense of accomplishment, boosting their confidence and encouraging them to take on more complex creative projects. It is a fundamental pre-academic skill often introduced in preschool and kindergarten settings to prepare for more structured learning.
How to Implement Cutting and Scissor Skills
Creating a safe and structured environment is essential for introducing scissors. Ensure your child is seated comfortably with their feet on the floor or a stable surface, which an Ocodile step stool can provide at a standard table, promoting better posture and control.
- Start with Snipping: Begin with small, 1-inch wide strips of thick paper (like cardstock or construction paper). Show your child how to make single "snips" across the strip, which is much easier than cutting a continuous line.
- Introduce Lines: Once they master snipping, provide paper with straight, thick lines drawn on it. Progress from straight lines to zig-zag lines, and then to simple curved lines.
- Move to Shapes: After they can follow lines, introduce simple shapes like squares and triangles. Circles and more complex figures can be introduced once they have developed more control and confidence.
Key Insight: The focus should always be on proper grip and safety. Teach the "thumbs up" rule: thumb in the top hole of the scissors and pointed toward the ceiling. Consistent, gentle reminders about how to hold both the scissors and the paper will build good habits from the start.
Tips for Success and Variations
To make scissor practice effective and fun, consider these adaptations:
- Vary the Materials: Cut different textures like play-doh, cooked spaghetti, straws, or leaves to provide varied resistance and sensory feedback.
- Use Visual Cues: Place a small sticker or draw a smiley face on the thumbnail of their cutting hand to remind them which way is "up."
- Make it Purposeful: Turn cutting practice into a craft. Have them snip paper to create "confetti" or cut out pictures from a magazine to make a collage.
Always use child-safe scissors with blunt tips and provide supervision, especially in the early stages. This activity is ideal for preschoolers who have developed the initial hand strength to open and close scissors.
4. Playdough and Clay Manipulation
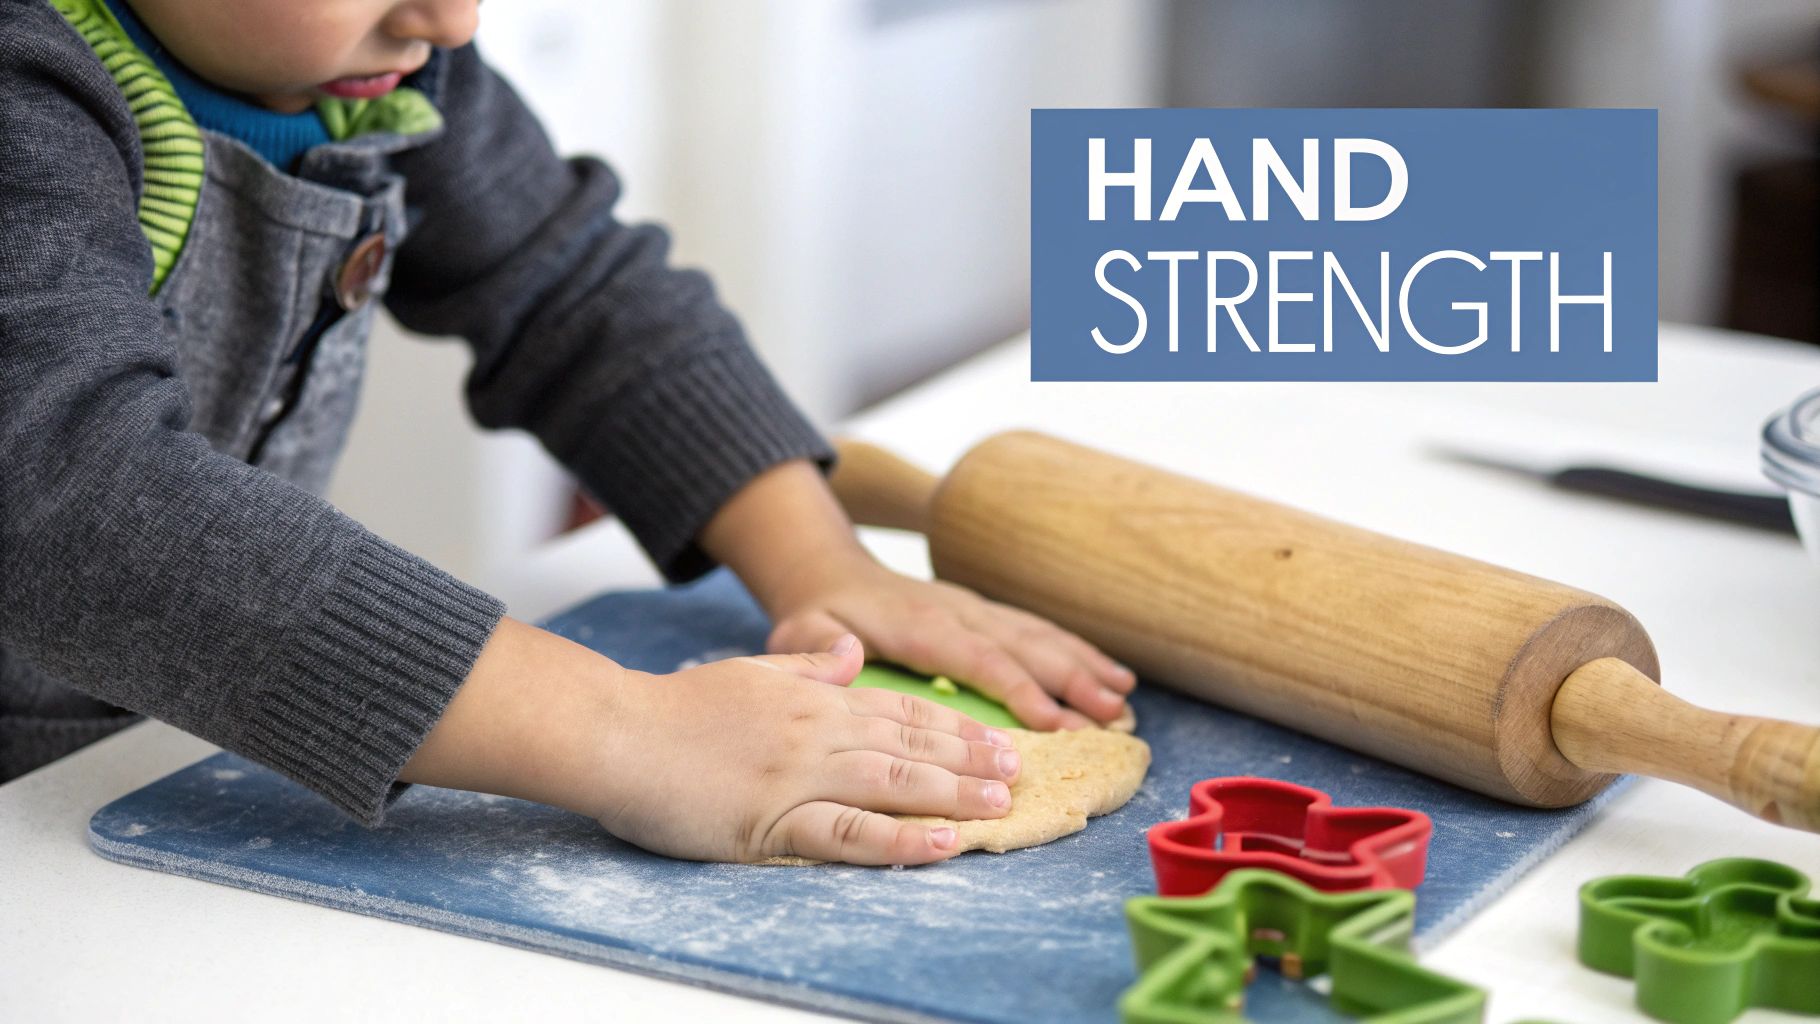
Working with playdough and modeling clay is a classic childhood activity that serves as a fantastic tool for fine motor skills development activities. The simple acts of squishing, rolling, pinching, and shaping these malleable materials are powerful exercises for strengthening the small muscles in a child’s hands and fingers. This tactile, three-dimensional play enhances hand-eye coordination, dexterity, and creative expression.
This activity provides immense sensory satisfaction and can be a calming, stress-relieving experience for young children. The nature of playdough allows for endless experimentation and self-correction, building resilience and problem-solving skills as children bring their imaginative ideas to life. From simple snakes to intricate sculptures, the possibilities are limitless, making it an endlessly engaging pursuit.
How to Implement Playdough and Clay Manipulation
Creating a dedicated and mess-friendly space is crucial for successful playdough sessions. Using a kitchen counter, with the child safely elevated by an Ocodile standing tower, or a low table allows for comfortable, focused work. A play mat or tray helps contain the materials and makes cleanup straightforward.
- Start with Exploration: Initially, just provide a lump of playdough and let your child explore its texture and properties. Encourage them to poke, squeeze, and flatten it with their hands.
- Introduce Basic Techniques: Demonstrate how to roll the dough into a ball between their palms or roll it into a long "snake" on the table. Show them how to pinch off small pieces.
- Incorporate Tools: Once they are comfortable, introduce simple tools like a child-safe rolling pin, cookie cutters, or even a garlic press to create different shapes and textures.
Key Insight: The focus should be on the process, not the final product. Allow for unstructured, child-led exploration. This builds not only motor skills but also creativity, concentration, and the confidence to experiment without fear of making a mistake.
Tips for Success and Variations
To keep the activity fresh and continually challenging, try these ideas:
- Make Your Own: Create homemade playdough with flour, salt, cream of tartar, water, and oil. This allows you to control the ingredients and involve your child in the making process.
- Add Natural Elements: Incorporate items like beads, buttons, pasta, or small twigs for children to press into the dough, which requires more precise finger control.
- Create Themed Trays: Set up a "bakery" with small pans and pretend sprinkles, or a "garden" with flower-shaped cutters and green and brown dough.
This activity is ideal for toddlers and preschoolers who are developing hand strength and coordination. It provides a rich sensory experience while laying the groundwork for more complex skills like writing and cutting.
5. Buttoning, Zipping, and Fastening Activities
Buttoning, zipping, and fastening are essential practical life skills that directly translate into a child’s daily routine. These tasks are fantastic fine motor skills development activities, requiring precise pincer grasps, hand-eye coordination, and bilateral coordination, which is the ability to use both hands together for a single task. Mastering these skills is a significant step toward self-care and autonomy.
This activity is a cornerstone of a child's journey to independence. Successfully buttoning a coat or zipping a jacket provides an immense confidence boost, reinforcing their sense of competence. It transforms the daily routine of getting dressed from a passive experience into an active, empowering one, directly aligning with the principles found in Montessori practical life activities.
How to Implement Buttoning and Zipping
Creating a patient and prepared environment is crucial. Start with specialized tools like dressing frames before moving on to actual clothing, and ensure the child is positioned comfortably for focused work.
- Start with Frames: Introduce Montessori-style dressing frames, beginning with the easiest fasteners. The typical progression is large buttons, then snaps, zippers, small buttons, and finally bows or ties.
- Use Oversized Items: Begin with large buttons and oversized buttonholes, or a chunky zipper on a practice board. This allows the child to learn the motion without the frustration of tiny, difficult-to-manage parts.
- Practice on Clothing: Once they show proficiency with frames, transition to their own clothing. Start with an oversized shirt or jacket laid flat on the floor or a table. This is easier than trying to fasten clothes they are already wearing.
Key Insight: The goal is skill acquisition, not speed. Practice during calm, unhurried moments, like a quiet afternoon, rather than during the morning rush. Patience is paramount; celebrate the effort and small successes, such as getting one button through the hole, to build motivation.
Tips for Success and Variations
To keep learning progressive and frustration-free, adapt the activity to your child’s developing abilities:
- Isolate the Skill: Use dressing frames or a "button snake" (a ribbon with a button sewn on one end to thread through felt squares) to isolate the specific motor plan without the complexity of managing a whole garment.
- Provide Assistance: Use hand-over-hand guidance to show the motion, gradually reducing support as they gain confidence and muscle memory.
- Position for Success: Have your child practice at a small table or use an Ocodile standing tower at a counter. This brings the work to a comfortable height, allowing them to focus their full attention on their hands.
Always ensure that any small parts like buttons are securely attached to prevent choking hazards, especially with younger children. This activity is ideal for preschoolers who are motivated to learn "big kid" skills and take charge of their own dressing.
6. Puzzle Completion and Piece Placement
Working with puzzles is a classic childhood activity, but it's also one of the most effective fine motor skills development activities for toddlers and preschoolers. The act of picking up, turning, and fitting pieces into their correct spots strengthens the pincer grasp, enhances hand-eye coordination, and refines wrist rotation. Beyond the physical mechanics, puzzles build crucial cognitive abilities like spatial awareness, shape recognition, and problem-solving.
This activity uniquely blends physical control with mental strategy. As children learn to manipulate pieces, they are also developing persistence and concentration. Completing a puzzle provides a tangible sense of accomplishment that boosts confidence and encourages them to tackle more complex challenges, making it a powerful tool for holistic development. Puzzles are also excellent examples of toddler problem-solving toys that engage a child’s analytical skills.
How to Implement Puzzle Completion
Creating a calm and organized environment is essential for successful puzzle work. A dedicated quiet corner with a child-sized table and chair or using an Ocodile standing tower at a low table can help a child focus without distractions.
- Start Simple: Begin with large, chunky wooden knob puzzles with 2-4 pieces. The large knobs are easy for small hands to grip, isolating the movement of placing the shape.
- Introduce Interlocking Pieces: Progress to simple jigsaw puzzles with 12-24 pieces. Look for puzzles with distinct colors and patterns to help your child identify matching sections.
- Build Complexity: As their skills grow, introduce puzzles with more pieces (24-48 and beyond) and more intricate images. A puzzle tray or mat can help contain the pieces and save progress.
Key Insight: The focus should be on the process, not speed. If a child is frustrated, model a strategy like finding all the edge pieces first or sorting pieces by color. This teaches problem-solving skills alongside fine motor refinement.
Tips for Success and Variations
To keep puzzle time engaging and developmentally appropriate, try these strategies:
- Create a Puzzle Library: Rotate puzzles regularly to maintain interest and prevent boredom. Storing them in clear, accessible containers allows the child to choose their own activity.
- Make it a Team Effort: Work on a larger floor puzzle as a family to encourage collaboration and social skills.
- DIY Puzzles: Create your own simple puzzles by cutting a picture from a magazine or a drawing into a few pieces.
7. Drawing, Coloring, and Pre-Writing Activities
Drawing and coloring are classic childhood pastimes that serve as powerful fine motor skills development activities. These creative pursuits require children to practice precise grip, control their hand movements, and coordinate their eyes and hands. From the first scribbles to detailed drawings, these activities build the essential muscle memory, dexterity, and strength in the fingers and hands necessary for handwriting.
This creative process is crucial for cognitive development and self-expression. As children learn to draw lines, shapes, and eventually recognizable objects, they are not only preparing for writing but also learning to communicate ideas visually. This builds confidence and provides a healthy outlet for expressing emotions and observations about their world.
How to Implement Drawing and Pre-Writing
Creating an inviting and accessible art space is essential. Using an Ocodile standing tower at a counter or a child-sized table ensures the child has a stable, ergonomic surface to work on, promoting better posture and focus.
- Start with Grip-Friendly Tools: Begin with large, chunky crayons or thick, washable markers that are easy for small hands to grasp. This helps build confidence before moving to more precise tools.
- Introduce Pre-Writing Patterns: Offer worksheets or draw simple patterns for your child to trace. Start with straight and curved lines, then move to more complex shapes like zigzags, waves, and spirals.
- Utilize Tracing Tools: Montessori-style metal insets are excellent for developing fine control, as the child traces shapes within a frame, strengthening the pincer grasp and hand stability.
Key Insight: The focus should always be on the process, not the final product. Celebrate your child's effort and experimentation. A scribbled page represents a significant effort in motor control and creative thought for a young child.
Tips for Success and Variations
To maintain interest and progressively challenge your child, try these variations:
- Vary the Mediums: Progress from crayons to colored pencils, watercolors, or finger paints to work different muscle groups.
- Change the Surface: Offer different paper sizes, textures, and colors. Drawing on an easel or a large sheet of paper on the floor can also change the physical dynamic.
- Provide Drawing Prompts: Encourage intentional creation by suggesting they draw their favorite animal, their family, or what they did that day.
For more ideas on how to foster artistic development, you can explore some creative art projects for preschoolers. For those interested in the artistic side of fine motor development, exploring resources like these books about illustration can offer additional inspiration.
8. Twisting, Turning, and Rotating Manipulatives
Twisting, turning, and rotating objects are dynamic fine motor skills development activities that build crucial wrist and forearm strength. Actions like unscrewing a lid or turning a knob require the forearm to supinate and pronate, movements that are fundamental for complex tasks later on, such as holding a pencil correctly and using tools like scissors or a screwdriver. These activities develop rotational control and bilateral coordination.
This skill set directly enhances a child's ability to interact with their environment and perform self-care tasks. From opening their own snack container to turning on a faucet to wash their hands, mastering these movements fosters a profound sense of autonomy. It empowers children to solve everyday problems independently, boosting their confidence and practical life capabilities.
How to Implement Twisting and Turning
Creating a dedicated 'busy basket' or practical life station is an excellent way to introduce these skills. Placing a collection of safe, engaging objects on a low shelf or in a basket invites exploration and repetition. Using an adjustable piece of furniture, like an Ocodile standing tower, allows a child to practice these skills at the kitchen counter, turning them into a helpful participant in daily routines.
- Start with Simple Containers: Begin with jars and bottles that have large, easy-to-grip lids. Show your child how to hold the container with one hand while twisting the lid with the other.
- Create a Discovery Board: Secure various items like old doorknobs, light switches, and large nuts and bolts to a sturdy board for a safe, stationary exploration station.
- Incorporate into Play: Use toys that require rotation, such as spinning tops, toy gears, or wind-up toys. These make the practice of twisting and turning fun and engaging.
Key Insight: The focus is on the rotational movement itself, not just the outcome. Observe how your child holds the object and uses their wrist. If they struggle, model the motion slowly and offer hand-over-hand guidance until they build the necessary muscle memory.
Tips for Success and Variations
To maintain interest and progressively challenge your child, adapt the activities as their skills improve:
- Vary Lid Tightness: As they gain strength, introduce containers with tighter or smaller lids that require more dexterity and force to open.
- Integrate Kitchen Tasks: Involve them in cooking by letting them twist the top on a spice jar or unscrew the lid from a container of ingredients.
- Use Water Play: Provide spray bottles or squeeze bottles during bath time or outdoor play, as these require a combination of gripping and rotational hand movements.
Always ensure the containers are clean, empty, and free of sharp edges. This type of play is ideal for toddlers and preschoolers who are naturally curious about how things in their world work.
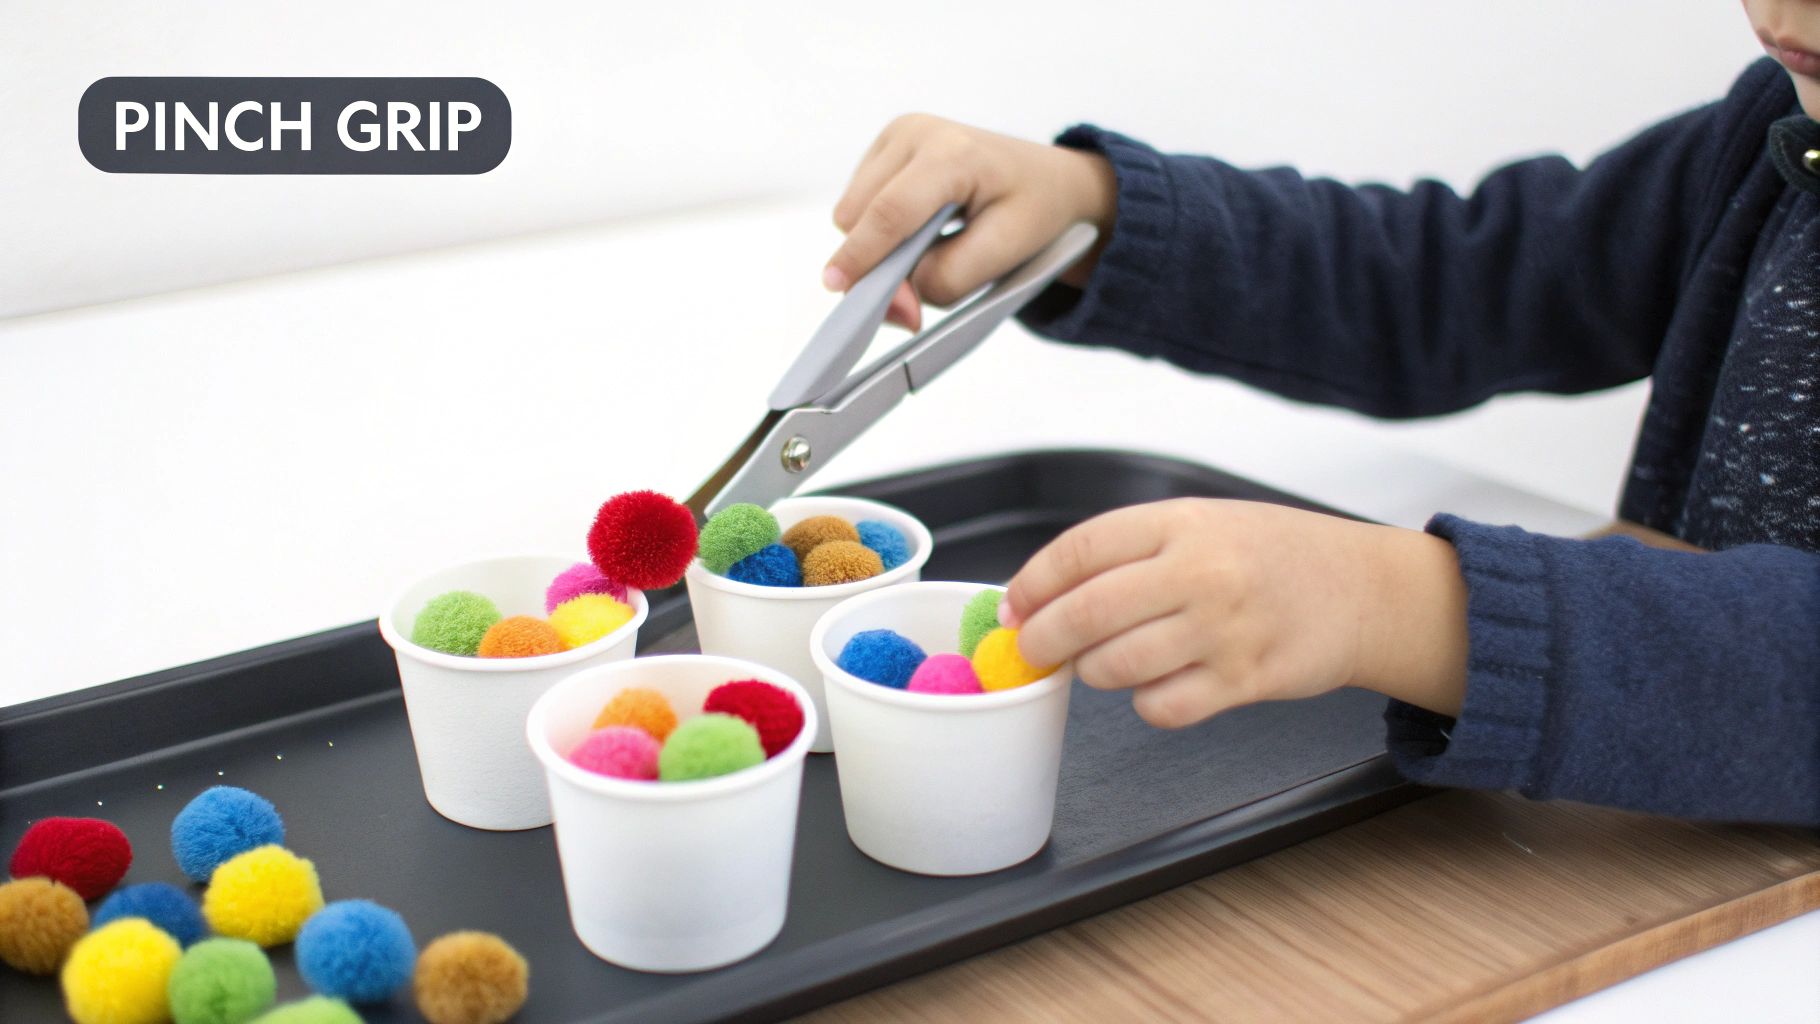
9. Pinching, Picking, and Grasping with Tweezers and Tongs
Using tools like tweezers and tongs to pick up small objects is one of the most effective fine motor skills development activities for building hand strength and precision. This activity specifically targets the development of the pincer grasp, which involves using the thumb and forefinger to pick up objects. This foundational skill is crucial for later tasks like buttoning clothes, zipping jackets, and holding a pencil correctly.
This focused work isolates and strengthens the small intrinsic muscles within the hand and fingers. The challenge of manipulating a tool to grasp an object provides a form of resistance training, enhancing finger dexterity, hand-eye coordination, and controlled release. It directly prepares a child for the nuanced movements required for writing and other intricate tasks.
How to Implement Pinching and Grasping Activities
Creating an inviting and accessible workspace is essential. A shallow tray on a child-sized table or an Ocodile standing tower at the kitchen counter provides a stable, contained area for concentration. This setup ensures the child can work comfortably without straining their arms or back.
- Start with Tongs: Begin with larger, child-friendly tongs (like sugar tongs or toast tongs) and soft, large objects like cotton balls or pom-poms. This allows the child to practice the grasping motion with their whole hand.
- Introduce Sorting: Add an element of cognitive challenge by providing a sorting tray or colored bowls. Ask your child to sort the pom-poms by color using the tongs.
- Progress to Tweezers: Once they are proficient with tongs, introduce child-safe tweezers. These require a more refined pincer grasp. Pair them with smaller items like beads, dry beans, or small pasta shapes.
Key Insight: The focus is on the controlled, deliberate movements required to operate the tool. Frustration can occur if the task is too difficult. Always observe your child's ability and adjust the tool or the objects to ensure the activity remains a positive and confidence-building experience.
Tips for Success and Variations
To keep this activity fresh and appropriately challenging, you can easily modify the setup:
- Create Thematic Trays: Set up a "rescue" mission where they use tweezers to save small plastic animals from a bowl of water beads, or a "treasure hunt" to pick out small gems from a tray of sand.
- Vary the Objects: Use a mix of objects with different shapes, textures, and weights to challenge their grip in new ways.
- Incorporate Practical Life: Use tongs to transfer snack items like berries or crackers from a communal bowl to their own plate.
Always supervise closely, especially when using small items, to ensure they are not a choking hazard. This activity is ideal for preschoolers who are ready to refine their hand control and build the strength needed for academic and self-care tasks.
10. Stringing, Lacing, and Threading with Various Materials
Stringing, lacing, and threading are classic fine motor skills development activities that require a child to manipulate a cord through holes in objects like beads or cards. These tasks are exceptional for developing hand-eye coordination, the pincer grasp, and bilateral coordination, which is the ability to use both hands together in a controlled manner. One hand must hold the object steady while the other guides the string, a complex skill that builds pathways in the brain for future tasks like buttoning a shirt or writing.
This type of activity strengthens a child’s ability to focus and complete a multi-step process, fostering patience and persistence. The satisfaction of creating a colorful necklace or a laced pattern provides a powerful sense of accomplishment, boosting self-esteem and encouraging creative expression through the choice of beads, colors, and patterns.
How to Implement Stringing, Lacing, and Threading
A comfortable and well-organized workspace is crucial for concentration. Placing the materials on a tray at a child-sized table or using an Ocodile standing tower at a counter allows the child to work at a comfortable height, reducing frustration and promoting focus.
- Start Large: Begin with large wooden beads with wide holes and a thick, stiff cord like a shoelace with an aglet (the plastic tip). This makes the initial threading process less challenging.
- Introduce Lacing Cards: Move on to sturdy lacing cards, either store-bought or homemade from cardboard. Initially, the holes should be far apart. Show your child how to go in one hole and out the next.
- Increase Complexity: As their control improves, introduce smaller beads (like pony beads) and more flexible strings or yarn. You can also offer lacing cards with more intricate patterns and smaller, closer-together holes.
Key Insight: The key is to manage the challenge level. If the string is too flimsy or the hole is too small, a child can become easily frustrated. Stiffening the end of a piece of yarn with a bit of tape or glue can make threading much easier for little hands.
Tips for Success and Variations
To maintain engagement and continually build skills, adapt the activity with these creative ideas:
- Vary the Materials: Use a wide range of items for stringing, such as large pasta shapes (penne, rigatoni), cut-up straws, or even natural items like leaves with holes punched in them.
- Create Patterns: Encourage older children to create simple patterns with different colored beads (e.g., red, blue, red, blue), which introduces early math concepts.
- Themed Activities: Make a "necklace" for a favorite stuffed animal or create "decorations" for a holiday by lacing specific shapes or colors.
Always supervise closely, especially when using small items like beads that could be a choking hazard for young children. This activity is highly adaptable for preschoolers and early elementary children seeking to refine their precision and control.
10-Point Fine Motor Activities Comparison
| Activity | 🔄 Implementation complexity | ⚡ Resource requirements | 📊 Expected outcomes | 💡 Ideal use cases | ⭐ Key advantages |
|---|---|---|---|---|---|
| Pouring and Transferring Activities | Low — simple setup, requires supervision for spills | Minimal — graduated containers, funnels, absorbent mat | Improved bilateral coordination, concentration, wrist control | Practical-life stations, kitchen involvement, Montessori shelves | Low cost; highly engaging; transfers to daily tasks |
| Beading and Threading Activities | Medium — fine motor demand; supervision for small parts | Moderate — beads, cords, tray; pattern cards optional | Finger dexterity, sequencing, sustained attention | Quiet focused work, gift-making, pattern practice | Produces tangible finished items; scalable difficulty |
| Cutting and Scissor Skills Development | Medium–High — ongoing supervision and graded progression | Moderate — child-safe scissors, thick paper, cutting mats | Hand strength, bilateral coordination, pre-writing readiness | Pre-K scissor stations, craft projects, classroom prep | Essential pre-writing skill; direct classroom transfer |
| Playdough and Clay Manipulation | Low — easy to start; needs cleanup routine | Minimal — playdough/clay, mat, simple tools | Increased hand/finger strength, sensory regulation, creativity | Calming sensory work, open-ended creative sessions | Excellent for hand strength and imaginative play |
| Buttoning, Zipping, and Fastening Activities | High — progressive teaching, patience required | Moderate — dressing frames or real clothing, frames | Independence dressing skills; fine motor precision | Dressing practice, practical-life curriculum, special ed | Direct daily-life application; builds autonomy |
| Puzzle Completion and Piece Placement | Low–Medium — choose appropriate complexity | Minimal — puzzles, trays/boards, storage | Spatial reasoning, visual discrimination, persistence | Quiet focused time, cognitive-motor integration | Progressive difficulty; strong problem-solving gains |
| Drawing, Coloring, and Pre-Writing Activities | Low–Medium — gradual skill progression | Minimal — crayons, pencils, tracing sheets, insets | Pencil control, grip development, pre-writing patterns | Art stations, pre-writing practice, early literacy prep | Directly prepares for writing; fosters creativity |
| Twisting, Turning, and Rotating Manipulatives | Low — straightforward; durable materials advised | Minimal — lids, knobs, spinning toys, containers | Wrist rotation, forearm supination/pronation | Kitchen tasks, practical-life stations, quick drills | Direct transfer to real-life tasks (jars, knobs) |
| Pinching, Picking, and Grasping with Tweezers and Tongs | Medium — tool-sizing and progressive resistance | Minimal — child tweezers/tongs, small objects, trays | Pinch grip strength, intrinsic hand muscle development | OT exercises, sorting activities, fine-motor drills | Targeted pinch strengthening; easily measurable progress |
| Stringing, Lacing, and Threading with Various Materials | Medium — bilateral coordination focus; patience needed | Minimal — lacing cards, yarn, beads, sturdy boards | Bilateral coordination, sequencing, fine motor precision | Patterning activities, therapy, Montessori practical life | Builds coordinated two-hand use; creates motivating finished work |
Building a Foundation for Life, One Small Movement at a Time
The journey through the world of fine motor skills development activities is as intricate and rewarding as the skills themselves. From the focused precision of threading a bead to the satisfying snip of scissors through paper, each activity we have explored offers a unique pathway for your child to build strength, coordination, and confidence. This is not merely about strengthening tiny hand muscles; it is about constructing the fundamental building blocks for a lifetime of learning and independence.
When a child successfully pours water without spilling, manipulates playdough into a recognizable shape, or navigates a zipper, they are doing more than completing a task. They are forging crucial neural pathways, enhancing hand-eye coordination, and developing the pincer grasp that will one day allow them to hold a pencil, tie their shoes, and type on a keyboard. The ten core activities detailed in this guide-from pouring and transferring to lacing and drawing-provide a comprehensive toolkit for nurturing this essential growth.
Synthesizing the Core Principles
As you integrate these ideas into your daily rhythm, remember the overarching principles that elevate these activities from simple pastimes to powerful developmental tools. The Montessori approach encourages us to create a prepared environment where children can engage independently and purposefully. This means providing child-sized tools, accessible materials, and the freedom to explore at their own pace.
The most impactful takeaway is to focus on the process, not the product. Celebrate the effort, the concentration, and the incremental progress. A crooked line drawn with intense focus is a greater achievement than a perfectly colored picture completed with adult intervention. This philosophy fosters resilience, a positive attitude toward challenges, and an intrinsic motivation to learn.
Actionable Steps for Your Family
To translate this knowledge into immediate action, consider these next steps:
- Observe and Adapt: Pay close attention to your child's interests and current abilities. Do they gravitate toward sensory play with playdough, or are they captivated by the challenge of puzzles? Start there, and gradually introduce new activities, adjusting the difficulty as they master each stage.
- Integrate, Don't Isolate: Weave fine motor practice into everyday life. Let your child help with buttoning their coat, stirring ingredients in the kitchen, or sorting laundry by color using tongs. These real-world applications make learning meaningful and reinforce skills in a practical context.
- Create a "Yes" Space: Designate an area where your child has safe, independent access to a rotating selection of fine motor materials. An Ocodile standing tower, for instance, transforms your kitchen counter into an accessible workstation for pouring or playdough activities, empowering them to participate alongside you safely.
The Lasting Impact of Small Movements
Mastering fine motor skills has a profound ripple effect on a child's overall development. The patience learned while threading beads translates into the persistence needed to solve a math problem. The spatial awareness gained from completing a puzzle supports later reading and writing. The confidence built from mastering a button fosters the self-assurance to try new things and navigate social situations.
By thoughtfully selecting and presenting these fine motor skills development activities, you are not just keeping your child busy. You are acting as a facilitator of growth, a guide on their unique developmental path. You are providing the tools, the environment, and the encouragement they need to build a foundation of dexterity, problem-solving, and self-reliance that will serve them for the rest of their lives. Embrace these small moments, for they are the building blocks of a capable, confident, and curious individual.
Ready to create a perfectly prepared environment that fosters independence and skill-building? Discover how Ocodile's thoughtfully designed standing towers, step stools, and Montessori furniture can bring these fine motor skills development activities safely within your child's reach. Explore our collection at Ocodile and empower your little one's learning journey today.