


 - Monica
 - Lindsay
DIY Montessori Furniture Plans: A Complete Guide
Your child keeps dragging a chair across the kitchen floor because they want to wash berries, stir batter, or see what you're doing at the counter. Then they climb onto something that was never meant for little feet, and you're left choosing between independence and safety.
That tension is exactly why good Montessori furniture matters. The best pieces don't just look calm and minimal. They solve a practical problem. They let a child reach, participate, and put things back without needing an adult to lift them every few minutes.
Most articles on Montessori furniture plans give you one isolated build. A shelf here. A tower there. What parents usually need is a starting kit, plus honest guidance about what's worth building yourself and what deserves extra caution. That's what follows: three core builds, real trade-offs, and the finishing and safety details that too many DIY posts leave for last.
The Philosophy Behind Building for Your Child
A child who wants to do things alone doesn't need more entertainment. They need an environment that makes independence possible.
That idea sits at the heart of Montessori furniture. Maria Montessori opened the first Casa dei Bambini in Rome in 1907, and by 1911 the model had already spread internationally, including to Italy, Switzerland, and the United States, establishing the design logic that still shapes Montessori furniture today: furniture should fit the child's scale so they can independently reach, use, and return materials (historical overview of Montessori furniture principles).
Child-sized is not a style choice
A low shelf, a small table, and a floor-level bed are not decorative signals. They are functional decisions. When a shelf is reachable, a child can choose a book without asking. When a stool is stable, they can wash hands without balancing on a dining chair. When a bed is low, getting in and out becomes part of the child's own routine.
That's why the best Montessori furniture plans feel almost plain. They're not trying to impress adults. They're trying to remove friction for children.
Practical rule: If a child can't safely reach it, carry it, or return it, the furniture is working against independence.
Why DIY makes sense here
Building your own furniture gives you one advantage store-bought pieces often can't. You can match the piece to your child's actual reach, your room's awkward corners, and your daily routines. A narrow kitchen may need a compact stool. A shared bedroom may need a bed with a lighter visual footprint. A small play area may need open storage instead of deep bins.
It also changes how you evaluate a project. You stop asking, “Does this look Montessori?” and start asking better questions:
- Can my child use it alone?
- Can they move around it safely?
- Can they return materials without help?
- Will this piece still make sense as they grow?
What works in real homes
The plans that earn their keep are the ones children use every day. A stool near the sink. A floor bed that supports bedtime without lifting. A helper tower that brings a child into kitchen work without turning the counter into a fall hazard.
What doesn't work is building to the photo instead of the purpose. Tall shelves loaded with too much stuff look organized for about a day. Oversized pieces become adult furniture wearing a Montessori label. Wobbly builds undermine confidence fast.
The right build feels simple because it respects the child's body, not because it follows a trend.
The Perfect First Project A Versatile Step Stool
If you're new to woodworking, start with the stool. It teaches layout, square assembly, sanding, and finishing without asking you to solve the structural demands of a bed or tower. It also pays off immediately. A good stool gets used at the sink, the bookcase, the closet, and the kitchen counter edge where supervised help happens.

Start with proportion, not guesswork
Montessori furniture plans work best when you size them by stage, not by the idea of a “universal kid size.” A practical bookshelf guide uses 40 cm shelf height for infants, 60–81 cm for toddlers and preschoolers, and notes that a top shelf around 65 cm can work as a child develops, which is a useful reminder that access should drive the dimensions (age-based sizing guidance for Montessori furniture).
For a step stool, that same principle applies. Build for the child who will use it now. Don't make the first version too tall in hopes that it will last forever. A child uses a stool confidently when the climb feels natural and the top standing surface feels secure.
A simple stool plan
Use solid wood or quality plywood with a straight, flat face. Keep the shape basic.
Suggested parts
- Top step: one rectangular panel sized to your space and child
- Two side panels: mirror-image supports
- Lower stretcher or rung: ties the sides together low and wide
- Rear stretcher: adds rigidity and reduces racking
- Fasteners and glue: choose one joinery method and execute it cleanly
A beginner-friendly approach is glue plus screws into predrilled holes. If you're more comfortable with a pocket-hole jig, that works too. The key is not the method's prestige. The key is whether the stool stays square and resists side-to-side sway.
Assembly order that keeps it stable
- Cut both sides together so they match.
- Mark the step location on both sides from the same reference edge.
- Attach the lower stretcher first to create the base.
- Check for square before adding the top.
- Install the top step with even support on both sides.
- Add the rear stretcher to stiffen the frame.
- Sand every edge thoroughly before finish.
A stool fails long before it breaks. It starts to feel uncertain, then children step off-center, then the whole piece becomes less safe.
Keep the base wider than your instinct tells you. Narrow stools save a little floor space but lose confidence under active use. If the stool will live in a bathroom or kitchen, traction matters too. A smooth finish on top is fine, but the standing surface shouldn't feel slick.
For parents comparing build options before cutting lumber, this guide to the best step stool for kids is useful for spotting the features that matter in daily use.
Common mistakes on first builds
A few problems show up again and again:
- Too narrow at the base: The stool may look elegant, but it feels uneasy under a moving toddler.
- Sharp top corners: Knees and shins find these immediately.
- Rushed sanding: A quick pass is never enough for children's furniture.
- Skipping dry assembly: Misalignment shows up late, when glue and screws are already in place.
If you build one piece this month, build the stool. It gives a child real access and gives you the habits needed for every larger project that follows.
Building a Child-Led World The Floor Bed Plan
A floor bed changes more than sleep setup. It changes who controls entry and exit from the bed. That can be a wonderful fit for a child-ready room, but only if the structure is solid and the room itself is prepared with the same care.
This visual captures the developmental logic behind the floor bed.

The frame has to earn your trust
The best DIY floor beds are simple under the mattress and careful at the corners. A proven Montessori bed build uses 2x4s, 1x6 and 1x8 pine boards, pocket screws, dowels placed about 2 inches apart in the posts, 1/4-inch through-holes at the ridge joint, and a 3/4-inch plywood platform. When only strip plywood was available, extra 2x4 supports were added in the middle. The same build also shows why pre-drilling and clamping the frame square matters. Misaligned dowel holes and poorly supported platforms lead to rework before final assembly (DIY Montessori bed construction details).
That's the core lesson. Beds are not forgiving. If the platform lacks support, you'll get flex. If joints drift out of square, the frame fights you all the way through assembly.
A practical build sequence
Build the bed in subassemblies rather than trying to wrestle the whole frame at once.
| Part | What matters most |
|---|---|
| Base frame | Flat stock, square corners, tight joints |
| Platform support | Continuous support or enough cross support to prevent sagging |
| Posts and roof frame | Accurate matching angles and aligned holes |
| Rails and edges | Smooth geometry with no sharp contact points |
Start with the mattress platform. Get that right before you move upward. Then assemble end frames, join them with long rails, and only after that fit any house-frame top.
Later, compare your layout ideas with a finished Montessori floor bed frame to sense-check proportions and guard spacing.
A short build video can help you visualize sequencing before you commit to cuts.
Details that matter more than style
Rounded edges are not optional on a low bed. Children use the frame while waking, climbing, playing, and turning corners too fast. Ease every exposed edge you can touch. If you add rails, keep them smooth and predictable rather than decorative.
Build the platform as if it's the whole project. Once the mattress goes on, nobody sees the hidden support, but everyone feels it.
One more trade-off is worth stating plainly. A floor bed supports autonomy, but it also assumes the room is arranged for autonomy. Anchor other furniture, remove hazards within reach, and treat the entire room as part of the bed plan. Otherwise the bed is child-led and the room is not.
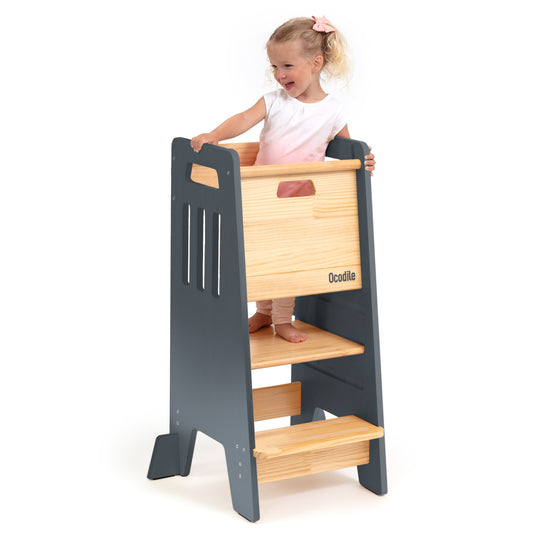
Reaching New Heights The Learning Tower Blueprint
The learning tower is the piece parents ask for first and the one I'd rank highest for caution. It can be fantastic in daily life. It can also become unstable or too easy to climb if the design chases looks over containment.

Why towers are different from stools
A stool helps a child reach. A tower creates a contained standing position at working height. That difference changes everything. The child is higher, often moving more, and usually leaning toward an interesting task. So the tower's job is not only elevation. It is stability plus enclosure.
That means your blueprint should prioritize these features:
- A wide base that resists tipping when weight shifts forward
- A secure standing platform with strong support beneath it
- Protective sides and back that reduce the chance of stepping or falling out
- No ladder-like side geometry that invites climbing onto the counter
- A finish with good grip underfoot, especially if socks enter the picture
A safer layout to build
The simplest reliable form uses four upright legs, a low step for climbing, a standing platform higher up, and side panels or rails that create a clear enclosure. I prefer a design where the child steps in and then stands inside the frame, rather than balancing on an exposed top surface.
Build the lower box first. If that base racks, the entire tower will feel uncertain. Then fit uprights, add the platform supports, install the standing platform, and close the upper section with rails or panels. Dry-fit the child entry area before final fastening so you don't accidentally make it awkward to climb.
A lot of attractive DIY plans miss the behavioral side of safety. If the sides look like a ladder, many children will treat them like one. If the back is too open, some children will lean or back out. If the footprint is too tight, active kitchen participation turns the whole piece into a balancing exercise.
Fixed platform or adjustable platform
This is the first major trade-off.
Fixed platform
- Easier to build square
- Fewer moving parts
- Less chance of hardware loosening over time
Adjustable platform
- Better for long-term use
- More complex to lay out accurately
- Requires careful attention to hardware fit and repeated checks
If you're building your first tower, fixed is often the safer choice because you can remove one whole category of failure points. If you build adjustable, test each platform position under load before regular use and keep inspecting it.
For parents deciding whether to build or buy, this review of a Montessori learning tower is useful because it highlights the practical features worth borrowing from professionally made designs.
What I would not compromise on
I wouldn't compromise on enclosure, base width, or joinery quality. I also wouldn't rush this build because children use towers in the most distracting room in the house. Cooking, conversation, water, and movement all happen at once.
Shop habit: If a tower feels only “pretty solid” in the garage, it's not ready for a child in a kitchen.
There's also a reasonable argument for not DIYing a tower at all. Unlike a low shelf, a tower has more severe consequences if you get the geometry or rigidity wrong. If your tools are limited, your cuts wander, or your assembly experience is still basic, a shelf or stool is often the better handmade project. You can still give your child a Montessori-style environment without making the highest-risk item your first advanced build.
From Raw Wood to Safe Haven Finishing and Safety Checks
A children's furniture project is not finished when assembly ends. Assembly creates the shape. Finishing and safety checks make it usable.
Too many DIY builds stop at “it stands up.” That standard is nowhere near high enough for something a child climbs, leans on, drags toys against, or touches with bare hands every day.

Sanding is part of the build
A separate Montessori-style toddler closet build reinforces an important finishing pattern: predrill, clamp the frame square, use pocket-hole screws and glue, then sand from 60 to 220 grit and round shelf edges before finishing to improve fit and reduce injury risk. Those steps aren't cosmetic. They remove the little hazards children find first.
Use your hands, not just your eyes. Slide your palm along every edge, inside corner, rail, and underside. If a corner feels crisp to you, it will feel harsher to a child moving quickly.
Tipping and anchoring deserve more attention
Many DIY plans explain dimensions but skip the hardest real-world safety question: what happens when a child pulls, climbs, or shifts weight unexpectedly? The U.S. CPSC has repeatedly warned that unsecured furniture can tip, causing injuries and deaths, which is why stability and wall anchoring matter as much as child-sized dimensions in Montessori furniture (discussion of tipping risks and anchoring gaps in DIY plan content).
That warning matters most for shelves, book displays, and some towers. Low doesn't always mean untippable. A child can still pull on an edge, climb onto a shelf, or use one piece to reach another.
My non-negotiable safety checklist
- Round every exposed edge: Ease corners enough that contact doesn't feel sharp.
- Tighten all hardware after finish cures: Fasteners can settle after assembly and sanding.
- Test for rocking on the actual floor: A flat garage floor hides problems that show up on tile or old wood floors.
- Anchor pieces that can tip: Shelves and storage units should not rely on weight alone.
- Check for pinch points: Moving or adjustable parts need extra scrutiny.
- Reject slippery top surfaces: A beautiful finish that feels slick under socks is the wrong finish.
Children don't use furniture gently. They test it with movement, repetition, and bad angles.
Choosing a finish without overcomplicating it
For children's furniture, I prefer simple, repairable finishes over thick, fussy ones. The right finish depends on the wood, the room, and how much abuse the piece will take. If you're weighing color versus visible grain, this guide to compare cabinet paint and stain is a helpful way to think through the maintenance trade-offs before you commit.
Whatever finish you choose, let it cure fully before use. Don't assume “dry to the touch” means ready for a child's bedroom or kitchen routine. And don't leave end grain rough just because it's less visible. That's where splinters and moisture trouble often begin.
The build only becomes family-safe after this stage. Before that, it's still just a project in progress.
Sourcing Materials and Adapting Your Plans
A good plan on the wrong material becomes a frustrating build. A modest plan on the right material often goes together cleanly and lasts. That's why material choice should follow function, tools, and skill level, not just appearance.
Pick wood by use, not by ideal
For a stool or shelf, straight pine is easy to find and easy to work with. For larger panels, decent plywood can save time because it starts flat and stays more predictable than poorly selected boards. If you're building something that takes repeated foot traffic, inspect every piece for twist, cup, and weak edges before buying.
This is also where beginners often make life harder than necessary. A design drawn for hardwood can usually be simplified for more forgiving stock if you respect span, support, and joinery. What matters most is consistency. Don't mix random scraps into a child's project unless you've checked each one carefully for stability and condition.
Tool limits should shape the project
Not everyone has a table saw, planer, and full bench setup. That's fine. Build within the accuracy your tools allow.
A few honest matches:
| Situation | Better choice | Why |
|---|---|---|
| Basic drill and circular saw | Step stool or simple shelf | Fewer compound cuts and easier squaring |
| Pocket-hole jig and clamps | Floor-level storage or basic bed frame | Strong beginner-friendly joinery |
| Limited workspace | Small open shelf | Easier to dry-fit and finish indoors |
| Minimal confidence with structural builds | Buy the tower, build the shelf | Safer division of effort |
If hardware selection feels like a weak point, spend a few minutes understanding screws, bolts, and hardware before you shop. Matching fastener type to material thickness prevents a lot of stripped holes, proud heads, and weak joints.
Which project should come first
Many parents search for Montessori furniture plans as a broad idea, but the right first project depends on the child's age, the home layout, and your confidence in the shop. A key gap in many guides is the lack of a decision framework, and there's also a useful contrarian point: not every project should be DIY, especially higher-risk items like towers that are harder to validate in a home workshop (discussion on choosing what to build first and when not to DIY).
Here's the practical version:
- Build a stool first if your child wants sink access and you want a fast, confidence-building project.
- Build a low shelf first if you live in a small space and need immediate organization with low risk.
- Build a floor bed first if the room is already child-ready and you're comfortable with structural assembly.
- Buy instead of build if the item raises the child high off the floor and you can't test it thoroughly.
Another trade-off rarely discussed clearly is storage capacity. Front-facing Montessori book displays look inviting, but they hold less by design because books need to stay visible and uncrowded. In compact homes, that often means rotating books instead of trying to store everything at once. If you need volume more than display, a mixed system usually works better than forcing one shelf to do both jobs.
Caring for Your Handcrafted Montessori Furniture
Once the furniture moves into daily family life, the job changes. You're no longer building. You're maintaining trust in the piece.
Children use furniture hard. They climb with damp feet, drag toys across rails, spill water, and test every corner with motion. That doesn't mean handmade pieces are fragile. It means they need routine checks if you want them to stay safe and pleasant to use.
A maintenance rhythm that works
Don't wait for a visible problem. Make inspection part of ordinary home upkeep.
A simple routine looks like this:
- Wipe with mild cleaners: Avoid harsh products that can dull or damage the finish.
- Check fasteners regularly: Screws can loosen from repeated movement and seasonal wood shift.
- Feel for rough spots: Hands catch splinters before eyes notice them.
- Watch high-contact edges: Step tops, bed rails, and shelf fronts wear first.
- Reassess stability after room changes: A piece that felt solid in one spot may wobble after moving.
Furniture for children ages in public. The wear tells you where the design is doing its job and where it needs attention.
When to refresh instead of replace
Small repairs keep a piece useful for years. Light sanding on a worn edge, a tightened joint, or a refreshed topcoat can bring back both safety and appearance. What matters is catching the issue early, before looseness turns into movement and movement turns into damage.
Wood choice affects this maintenance cycle too. Some species dent more easily, some hold edges better, and some accept finish touch-ups more gracefully. If you want a clearer sense of how different materials behave over time, this guide to furniture wood types is a helpful reference when you're planning future builds.
The long-term value of building it yourself
The main advantage of handmade Montessori furniture isn't just cost or customization. It's that you understand the piece from the inside out. You know where the supports are, how the joints went together, what finish is on the wood, and what normal wear looks like.
That knowledge makes maintenance easier. It also makes your standards higher. You notice the slight wobble sooner. You sand the rough edge before it becomes a splinter. You adapt the room as your child grows rather than waiting for a product to fail.
Good Montessori furniture isn't precious. It's durable, repairable, and used every day. If you built it with care and keep checking it with the same mindset, it becomes part of your family's working environment, not just part of the decor.
If you'd rather skip the sawdust on higher-risk pieces and choose furniture designed around child independence and safety, Ocodile is worth a look. They focus on practical family pieces like standing towers, floor beds, and step stools that support daily participation without losing sight of safe materials, child-friendly proportions, and real home use.