



Montessori Knife Set Guide for Safe Independent Cutting
A toddler reaches for the banana just as you do. One hand is already on the chair, the other is pointing at the cutting board, and the whole body says, I want to help too. That moment can feel sweet, and a little tense, because the question underneath it is never just about fruit. It's about whether your child is ready for a real tool, how much freedom makes sense, and how to keep the kitchen calm while your child learns something meaningful.
A Montessori knife set belongs in that moment, not as a shopping list item, but as a developmental sequence. Montessori teaching treats cutting as practical life work, built step by step, with tools that fit the child's hands, coordination, and supervision level. That's why this guide doesn't start with “which knife should I buy?” It starts with readiness, then moves through the kinds of tools children use, how the progression usually unfolds, and how a parent can teach the first safe cutting lesson with steady hands and a quiet voice. For a related overview of practical life work, see Montessori practical life activities.
When Your Toddler Wants to Slice the Banana
Your child pulls a chair to the counter, watches you peel a banana, and asks to do it too. That's usually the beginning of the search for a Montessori knife set. The question isn't whether children should be near the kitchen, it's how to let them enter it with a tool that matches what they can do.
The child is asking for work, not just help
Children often want the exact thing adults are doing, not a toy version of it. If the task is cutting fruit, a Montessori response is to offer a real, child-sized way to participate, starting from the child's current hand control instead of jumping straight to an adult knife. A parent who sees this clearly can respond with less fear and more structure.
Practical rule: if the child can't yet hold food steady, the knife should be simpler, softer, or paired with more adult help.
That's the mindset behind this guide. The knife set is treated as a learning path, not a single product. Some children begin with a spreader, some with a plastic training knife, and some move faster than parents expect when the environment is calm and the lesson is short.
What parents usually want answered
The quiet questions are predictable. Is my child too young? Does a knife have to be sharp to be useful? How do I prevent the whole thing from turning into a mess of slipped banana pieces and crossed nerves?
This article answers those questions in order. It explains what the set is, how Montessori guides usually stage the skill, which materials matter, how to teach the first lesson, and how to store and retire tools over time. The goal is not to rush independence. It's to help you read your child's readiness with enough confidence that the kitchen feels like a place of practice, not danger.
What a Montessori Knife Set Actually Is
A Montessori knife set is a small sequence of cutting tools, not a single knife. Each tool matches a different stage of hand development, so the child meets a task that fits the hands they have, not the hands adults wish they had. In a prepared Montessori environment, the adult chooses the tool for the child's real ability and stays close enough to keep the work calm and purposeful.

A philosophy made visible in tools
Children learn by doing real work, and the adult prepares the environment so that work can happen well. In the kitchen, that means offering a knife that is child-sized, light enough to control, and suited to the food and skill level in front of the child. A tool like that supports concentration, coordination, and confidence because the child is completing something real instead of rehearsing it.
The set is different from a toy kitchen accessory. Toy knives may look friendly, but they do not give true cutting feedback. An adult knife may be too heavy or too sharp for a small hand. The Montessori version sits between those extremes, giving the child a real task with a tool that is easier to manage.
Real tools, older tradition, child-sized design
Knives are among the oldest eating tools still in use, and cutlery covers domestic, commercial, and industrial cutting implements. Forks came later and became commonplace much more recently in historical terms, and the French helped popularize the full three-piece set of knife, spoon, and fork in the 18th century, according to Britannica's overview of cutlery. That context helps explain why a Montessori knife set is a child-development adaptation of an old tool tradition rather than a novelty.
Parents usually mean a set that may include a spreader, a wavy or serrated child knife, and sometimes a small real knife for later stages. The point is fit, both physical and developmental. A child who is still building grip strength needs a different tool from a child who can already hold food steady and guide a blade with control.
The Age Progression Montessori Guides Recommend
A child who asks for the banana to be cut is often showing more than hunger. The request can signal interest in a real practical-life skill, and Montessori knife use usually grows in stages as that interest meets better hand control. One guide recommends starting with spreaders or butter knives at 18 to 24 months, then moving to a wavy chopper or plastic training knife at 24 to 36 months, followed by limited real-knife use at 3 to 4 years, and a gradual shift toward more independence at 4 to 6 years. Those are age bands, not a universal rule. Readiness is the key signal.

What each stage is teaching
A spreader teaches pressure control. The child learns that a hand can move food across a surface without slicing force. That matters because many toddlers need time to learn how to use a tool without squeezing too hard or pushing too fast.
A wavy chopper or plastic training knife adds texture and feedback. These tools give the child a clearer sense of how the blade meets the food, which is helpful before the hand is ready for a sharper edge. Some Montessori-focused guidance describes a child beginning with a wavy chopper at 15 months, while some Montessori parents introduce real knives as early as 2 years old when progression and supervision are in place. Those examples do not replace the staged sequence. They show that readiness can appear earlier when a child has steady hand control and a careful adult nearby.
A child who can keep food still and keep attention on the board is often ready for more than a child who only likes the idea of using a knife.
The move to a real knife is not about proving independence. It is about whether the child can manage grip, movement, and attention without turning the cutting motion into a struggle. That is why Montessori guidance keeps returning to supervision and coordination instead of a calendar date. For families who want a broader view of blade styles, New Zealand knife types is a useful reference point for seeing how different knife forms serve different tasks.
Reading readiness without overthinking it
Parents often ask whether they should wait for a certain birthday. A better question is whether the child can work with both hands, hold the food steady, and follow a simple sequence. If those pieces are shaky, the child usually benefits from staying with the easier tool a little longer.
A staged progression also keeps frustration lower. When the tool matches the child, cutting feels like success, not a test. That feeling matters more than speed.
Materials and Design Features Worth Comparing
The material of a child's knife changes how the tool feels in the hand, how it responds to food, and how much concern you carry while supervising. A child-safe Montessori knife may use serrated plastic, nylon, wood, or, for older children, stainless steel. Each one serves a different stage, so the best choice depends on skill, not just age.
Why serrations matter
Serrations give the child grip on soft produce skins and slippery surfaces. A serrated plastic blade can cut fruit and vegetables with much less edge aggressiveness than a metal knife, while still giving the child a real sense of resistance and movement. Some child-safe versions also use BPA-free plastic construction, which makes them feel more like learning tools than kitchen hardware.
For parents who want a wider overview of kitchen knife categories, this guide to New Zealand knife types is a useful reference point for understanding how blade forms differ in the adult kitchen too. It's not a Montessori guide, but it does help families see that blade shape changes function.
Compare the common materials
| Material | Safety Feel | Cutting Ability | Best Age Band |
|---|---|---|---|
| Serrated plastic | Softer edge feel, lower laceration risk | Good for soft foods | Early toddler stage |
| Nylon | Light and forgiving in the hand | Useful for early cutting practice | Toddler to preschool stage |
| Wood | Warm, familiar, stable grip | Limited cutting power, more practice than slicing | Early practice or pretend work |
| Stainless steel | Familiar kitchen feel, requires close supervision | Strong cutting ability | Older preschool and beyond |
The decision isn't whether a set looks Montessori enough. It's whether the tool matches the child's coordination, grip strength, and ability to use the non-cutting hand well. Some multi-piece sets are marketed for children roughly 4 to 12 years old, but that kind of range only helps if it's read as a rough market category, not a readiness verdict Amazon Canada listing with Montessori kitchen guidance.
What to pay attention to
Handle size matters. Weight matters. Blade length matters. A child who can't keep food fixed on the board may do better with pre-sliced pieces, while a child with a steadier grip can handle a more demanding tool. The best knife is the one the child can use cleanly, repeatedly, and with calm concentration.
How to Teach the First Safe Cutting Lesson
A first cutting lesson works best when the setup is quiet and simple. Put the cutting board on a stable surface, place a damp cloth underneath so it doesn't slide, and set out food that's already pre-sliced into manageable pieces. If you're introducing a knife, place it on a tray as part of the presentation, so the child sees the tool as work, not as a surprise.
A calm sequence for the first try
Begin with the handle grip. The child holds the knife like a hammer, not like a pencil. That grip usually gives the most control for a first lesson, because it keeps the wrist stable and lets the whole arm do the work.
Then shape the other hand into a claw. Fingertips curl back, knuckles face the blade, and the food stays anchored on the board. The motion should be a gentle press down, sometimes with a slight rocking movement, rather than a sawing scramble.
Practical rule: if the child is sawing wildly, the lesson is too hard or the food is too slippery.
Stand close enough to intervene, but not so close that your body takes over the child's work. Your job is to model, correct, and stop the activity before frustration turns the lesson sour. End while interest is still present, even if the child could keep going. That's how the next session starts from confidence instead of fatigue.
Make the second session easier, not fancier
The second lesson should usually look similar, not more complicated. Same board. Same food. Same knife, if the child handled it well. If the first attempt went badly, lower the demand by choosing softer food or giving more pre-sliced pieces.
For kitchen safety guidance that pairs well with this lesson style, see kitchen safety for toddlers. A smooth first experience often comes from preparation, not from repeating instructions louder.
A parent who cooks regularly may find this logic familiar. Good technique often depends on setup, and even in a different world, people who use tools for consistent sourdough baking know that the right equipment and process can make a task steadier from the start. Children need the same kind of quiet support.
Caring for and Storing the Set Over Time
A Montessori knife set stays useful because it's cared for consistently. The goal is to keep the tools safe, clean, and easy for the child to reach without turning every use into a request for permission.

Cleaning and inspection
Wash nylon and plastic pieces by hand when possible, unless the manufacturer specifically says they're dishwasher safe. Wood pieces need prompt drying, because lingering moisture can lead to splitting or a rough feel in the hand. If a serrated plastic blade develops cracks or rough edges, retire it.
You don't need to sharpen most child-safe plastic or nylon tools. What matters more is checking whether the edge has worn in a way that changes the feel of the cut. A tool that no longer behaves consistently can confuse a child who is still learning force control.
Storage that supports independence
Keep the set on a low tray or in a designated drawer that the child can reach. That way, the child can self-select the work instead of asking for the knife every time. Montessori storage isn't about decoration. It's about making the child's next action obvious.
Retiring tools as skills grow
A spreader can usually step out once the child no longer needs that very soft introduction. A nylon or plastic chopper can retire when the child starts using a knife with reasonable control. That knife becomes the default only when the child can manage the full sequence without constant help.
Parents often hold onto the older tool too long because it feels safer. That's understandable. But if the child has clearly moved past it, keeping the tool in rotation can slow the transition into real competence.
Buying Considerations and Honest Alternatives
A parent can assess a Montessori knife set by touching the handle and looking at how the tool will fit the child's current hand, not by reading the box for the fanciest promise. A good candidate usually has a handle that the child can hold without squeezing, a blade length that doesn't overwhelm the board, and a weight that doesn't pull the wrist off balance. The best match still depends on whether the child can steady the food and use both hands together.
What counts as a reasonable option
Not every family needs a full dedicated set. A single child-sized knife can be enough. A butter knife can work for the earliest stage. A wooden play knife can still have a place for pretend work or for children who need to rehearse the motion before using a cutting tool with more function.
That flexibility matters because a family's real life doesn't always line up with product bundles. If you're comparing options through a gifting lens, even platforms built for product discovery, like browse influencer gifting platforms, can remind you that presentation is not the same thing as developmental fit.
Practical rule: buy for the stage you can observe today, not the stage you hope will arrive next month.
The wider family setup matters too
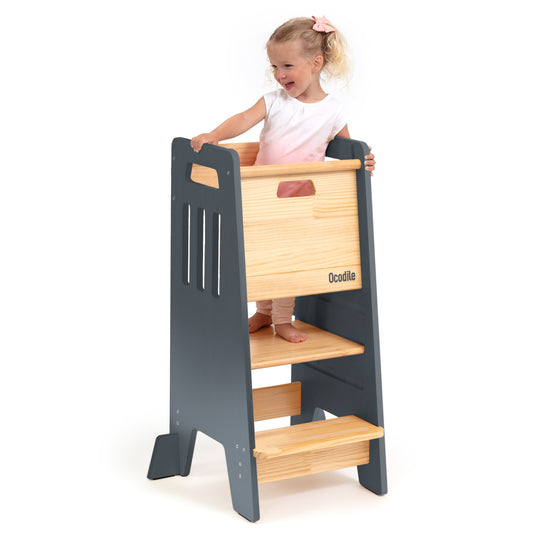
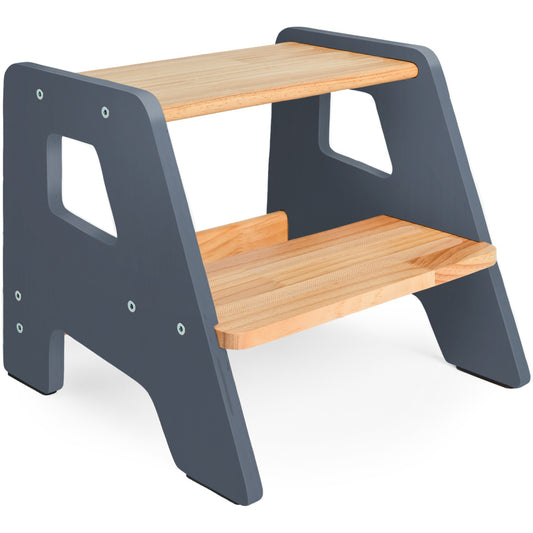
Knife work is easier when the child can stand at counter height with support. That's why a sturdy helper tower or step stool often belongs in the same conversation. A child who can't reach the work surface safely will struggle to focus on cutting, even with the right tool.
For families comparing that part of the setup, Montessori kitchen helper tower ideas fit naturally beside knife-skills work. The same principle applies across the house. Safe access supports real participation.
Common Questions Parents Ask Before Starting
A first lesson rarely ends all the questions. It usually opens a few more, and that's normal. Parents want to know what to do when attention fades, whether mouthing is a dealbreaker, and how to handle siblings without turning one tool into a source of conflict.

What if my child loses focus halfway through
Stop the lesson. Don't push for one more slice just because the food is out. Cutting requires attention, and once focus drops, the tool should leave the child's hand.
A short, successful session teaches more than a long, messy one. End the work, clean up together, and return to it later when the child is fresh.
Is this safe if my child still puts things in their mouth
Not automatically. Mouthing means the child may need more supervision, simpler materials, or a delay before real cutting work begins. A safer tool and a closer adult presence can help, but readiness still matters.
If the child explores everything orally, keep the activity very limited and highly supervised. The point is not to force the knife into the routine. It's to wait until the child can use it with enough self-control.
Should siblings share one set
They can, if the setup supports turn-taking and the tools match each child's stage. Some families keep separate trays so each child sees their own work and returns it properly. That's often easier for younger siblings who are still learning order.
How long should a daily cutting activity last
Short enough that the child stays interested. Montessori work doesn't need to be long to be meaningful. A child who leaves the table calm and satisfied usually learned more than one who stayed until everyone was tired.
The deeper lesson is trust. A child can be trusted with real work when the work is prepared well, the tool matches the hand, and the adult stays steady. That's the heart of a Montessori knife set, a small tool that helps a child move from watching to doing, one careful slice at a time.
If you're ready to set up a child-sized kitchen space that supports real participation, visit Ocodile and explore practical pieces that help children stand safely, reach comfortably, and join everyday family work with confidence.