


 - Monica
 - Lindsay
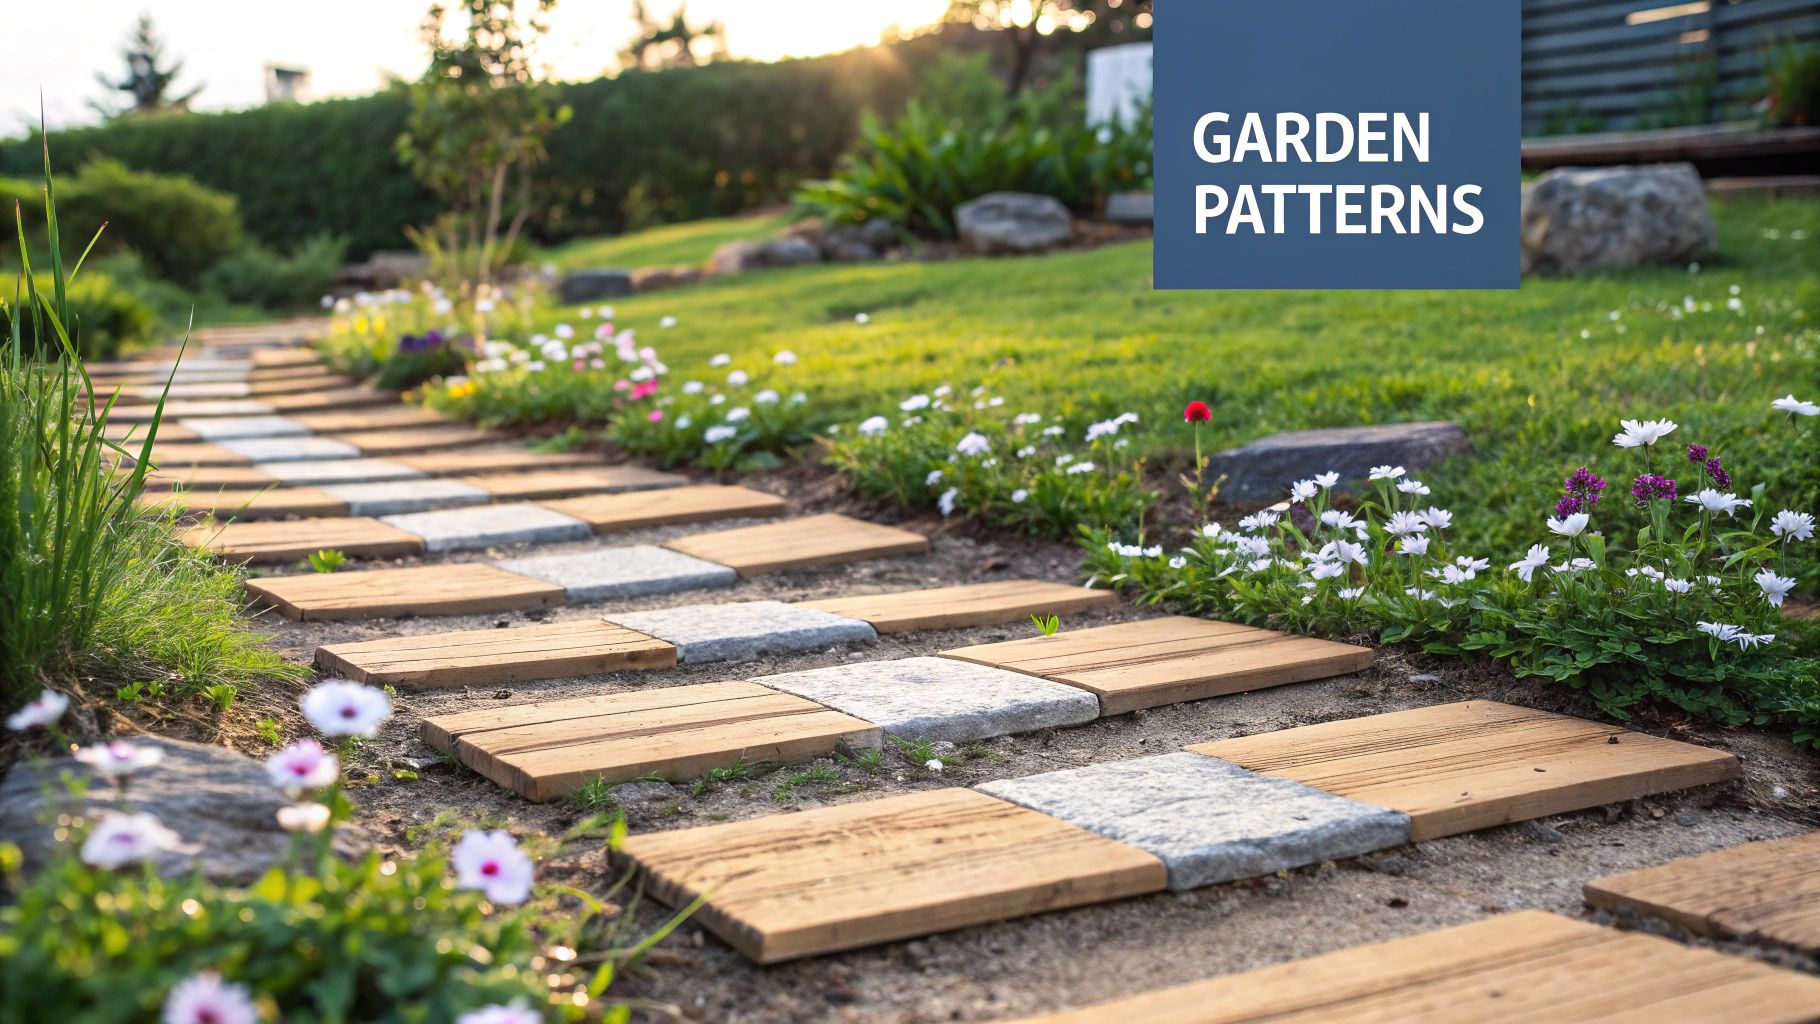
Build a Wood Stepping Stone Path Your Way
There's something uniquely charming about a path made from natural wood slices. It’s a beautiful, organic alternative to the usual stone or concrete, grounding your garden with a certain warmth and rustic feel. They're perfect for laying an enchanting walkway through flower beds or creating a durable, kid-friendly route across the lawn. The real trick is picking the right kind of wood and finishing it properly so it stands the test of time.
Why Go with a Wood Stepping Stone Path?
A wooden path is more than just a way to get from A to B; it genuinely changes the atmosphere of your outdoor space. Unlike cold, hard pavers, wood introduces a soft, natural texture that just blends right in with plants, soil, and mulch. It’s a choice that leans into organic beauty and sustainability—a feeling that’s really catching on.
You can see this trend everywhere in the home and garden world. Just look at the global wooden decking market, which hit a value of USD 8.3 billion in 2024. The residential slice of that pie was a massive 76%. This tells us that people are really craving natural, good-looking materials for their home landscaping projects. You can read more about this trend in outdoor living materials if you're curious.
Great for Your Garden, Even Better for Your Family
Taking on a DIY wood stepping stone project has some pretty compelling upsides:
- Real Character: Every single wood slice has its own unique grain, color, and shape. You get a kind of character that factory-made materials just can't copy. It creates a look that feels both timeless and deeply personal.
- Kid-Friendly by Design: Once you sand and seal them properly, wooden stones are splinter-free and have a much softer surface than concrete. This makes them a far safer bet for areas where kids will be playing.
- Easy on the Wallet: If you're lucky enough to have access to fallen trees or logs, this can be an incredibly low-cost project. But even if you have to buy the wood, it can still be a more affordable route than high-end stone pavers.
- A Touch of Nature: Using natural wood just fosters a closer connection to the environment. It’s a sustainable choice that celebrates the beauty of natural materials, right in your own backyard.
The Bottom Line: A wood stepping stone path isn't just a functional walkway. It's a statement piece that amps up your garden's natural vibe, gives the kids a safe surface to play on, and fits right in with a more eco-conscious way of landscaping. This project is all about crafting something beautiful and useful with your own two hands.
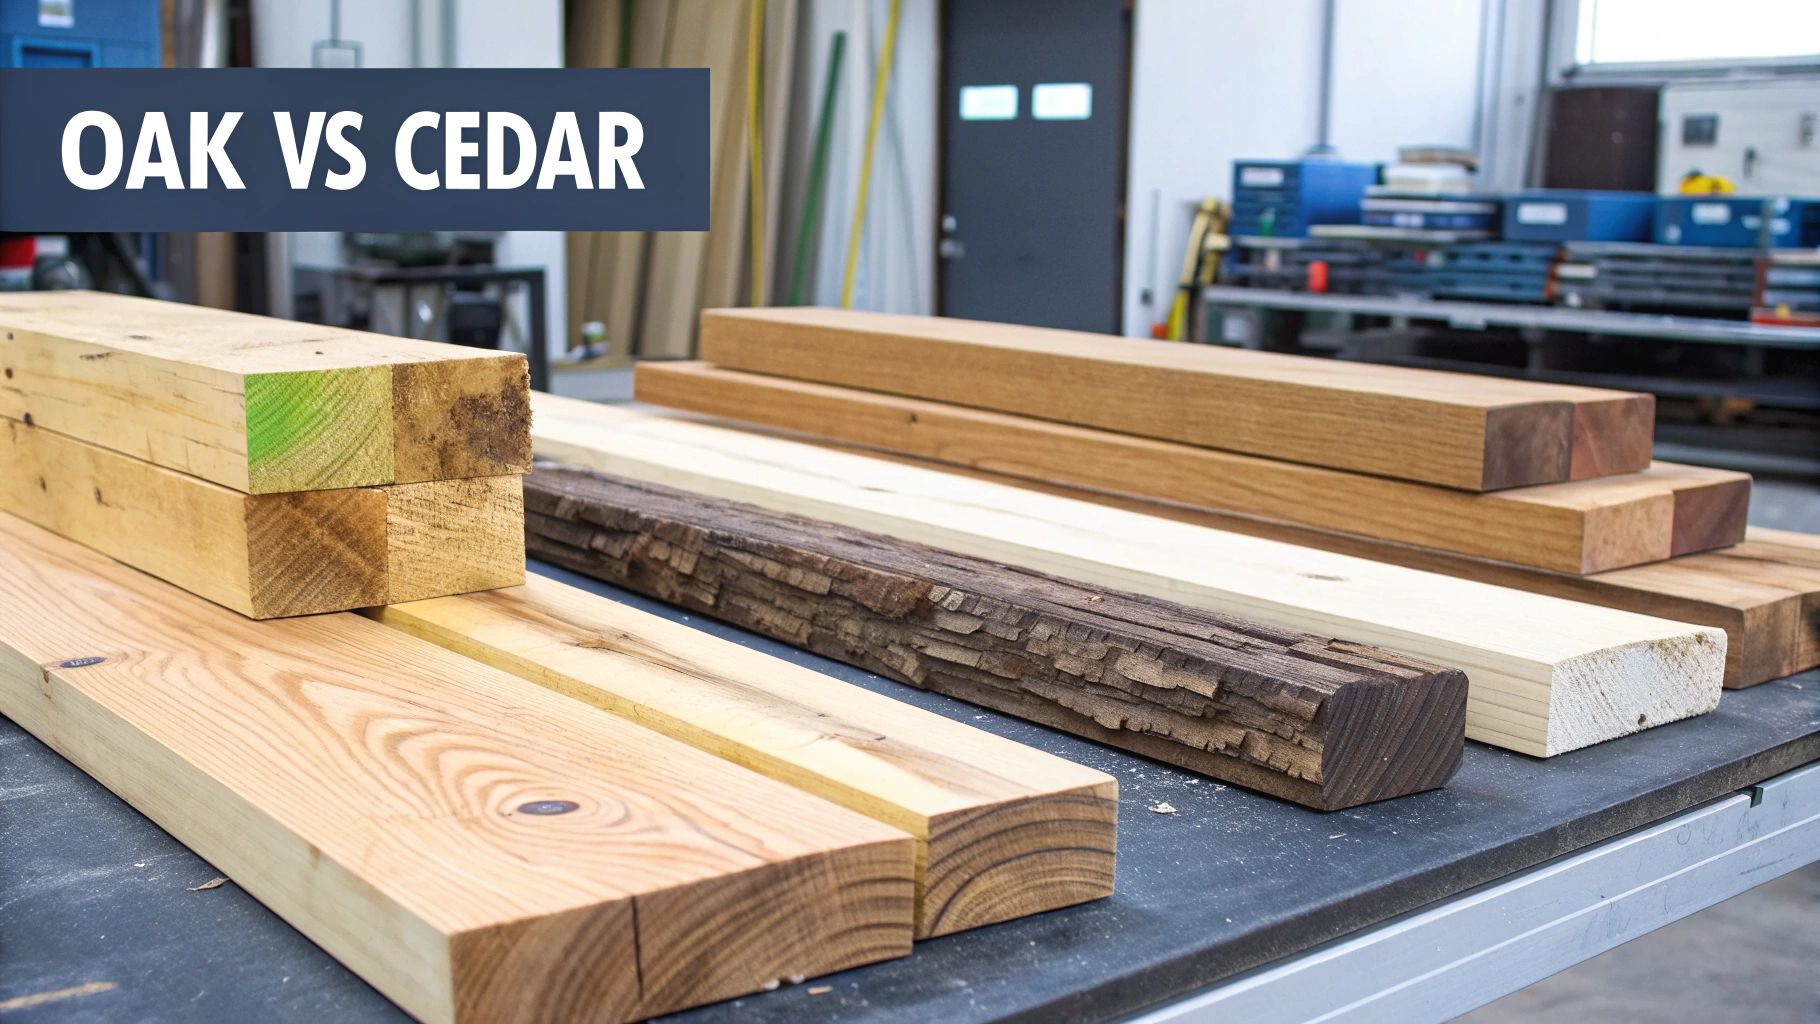
Choosing the Right Wood for Your Stepping Stones
Picking the right wood for your stepping stone path is probably the single most important decision you'll make for this whole project. It’s not just about looks; you're essentially choosing a champion to battle constant ground contact, moisture, insects, and whatever the seasons throw at it. Your choice here is the difference between a path that lasts a couple of years and one that becomes a permanent fixture in your garden for decades.
The whole game is about selecting a wood species that is naturally built to resist decay. You want something dense, packed with its own natural protective oils, and with a history of holding up outdoors when buried in the ground. Some woods just aren't cut out for this and will start to rot away before you know it.
Prioritizing Rot Resistance and Durability
For a stepping stone that truly lasts, you need a type of wood that can handle being in direct contact with damp soil day in and day out. Pressure-treated pine is a common go-to because it's affordable, but a lot of us prefer to steer clear of the chemicals, especially in a garden where kids and pets play.
Thankfully, nature has some incredible alternatives. Woods like Black Locust, Osage Orange, and Redwood are legendary for their ability to withstand the elements. They are naturally loaded with compounds that act like preservatives, actively warding off moisture and the fungi that cause rot. They might cost a bit more or be harder to track down, but the extended lifespan often makes the investment worthwhile.
Expert Insight: Here’s a tip from experience: The most critical factor for longevity isn't just the wood species, but making sure it never sits in a puddle. A proper gravel base is your best friend in the fight against premature rot, no matter which wood you end up choosing.
Why Thickness Matters More Than You Think
When you're picking out your wood slices, aim for a good, solid thickness—something in the 4 to 6-inch range. This isn't just for show.
Thinner slices have a nasty habit of cracking, warping, and shifting around underfoot, which can be a tripping hazard. A thick, hefty wood round provides its own stability, staying put once you’ve set it in place.
That extra thickness also gives the wood more body to resist decay. Think of it this way: it will take much, much longer for rot to work its way through a 5-inch slice than a 2-inch one, giving you years of extra life from your path. Before you buy, give each slice a good look-over for any deep cracks or signs of insect damage. Those are weak spots that will only get worse with time.
This chart gives you a quick visual on how some of the most popular, naturally durable wood types compare when it comes to lifespan.
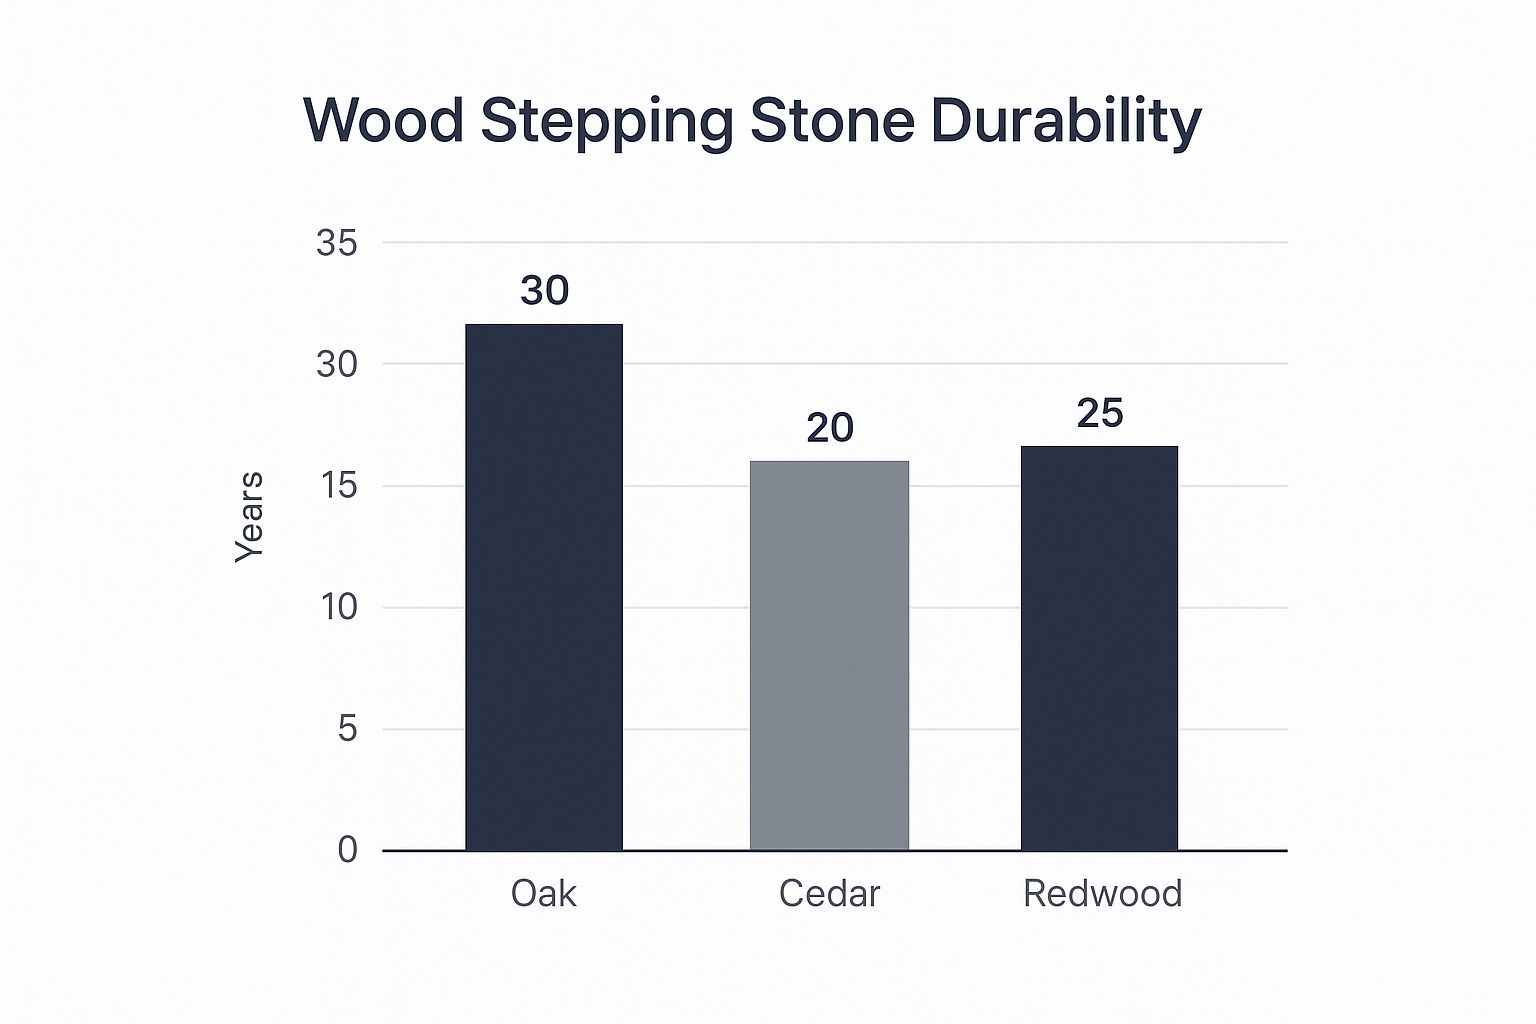
As you can see, while they're all solid choices, some species give you a major advantage in longevity. This same idea of picking durable, safe materials is just as important for other outdoor items. You can learn more about creating safe play areas in our guide to wooden climbing toys.
Wood Comparison for Outdoor Stepping Stones
To help you narrow down the options, here's a quick comparison of the top wood choices for ground-contact projects like this one.
| Wood Type | Natural Rot Resistance | Average Lifespan (Ground Contact) | Relative Cost |
|---|---|---|---|
| Black Locust | Extremely High | 20-40 years | High |
| Redwood | High | 15-25 years | High |
| Cedar | High | 15-20 years | Medium-High |
| Pressure-Treated Pine | High (Chemical) | 10-20 years | Low |
Finding that sweet spot between cost, what's available in your area, and long-term durability will point you to the perfect wood for your garden path.
How to Prepare and Cut Your Wood Slices
Alright, you've got your logs picked out. Now for the fun part—turning those heavy logs into the stepping stones you've been picturing. This is where your vision really starts to take shape, but it requires the right tools and a big focus on safety.
The best tool for this job, hands down, is a chainsaw. You could use a large handsaw, but a chainsaw will give you cleaner, more consistent cuts and save you a ton of time and sweat. Before you even think about starting it up, check your chain. A sharp, properly tensioned chain is non-negotiable; a dull one will just tear and splinter the wood, making it almost impossible to get a clean, flat surface.
First thing's first: make sure that log isn't going anywhere. A log that rolls mid-cut is a recipe for disaster. I always use a few wooden wedges or chocks to brace it firmly on both sides. This gives you a solid, stable base so you can focus on the cut itself.
Getting a Uniform Cut Every Time
Consistency is everything here. You want each stepping stone to be the same thickness for a path that looks professional and feels stable underfoot. I've found the sweet spot is somewhere between 4 and 6 inches thick.
A simple trick I use is a measuring tape and a lumber crayon (or even just chalk).
- Mark Your Cuts: Measure your desired thickness from the end of the log and draw a clear line all the way around. This is your guide.
- Take Your Time: Don't try to force the saw. Let its weight do the heavy lifting as you guide it along your line.
- Check for Level: After your first cut, grab a small level and see how you did. If the slice is a bit angled, no big deal. Just adjust your stance and pressure on the next one to compensate.
Taking a few extra minutes to get this right makes the final installation so much easier.
The Critical Curing Process
I know how tempting it is to get those freshly cut slices into the ground, but you have to resist. This waiting period is absolutely crucial. Freshly cut wood—what we call "green wood"—is full of moisture. If you install it now, it will twist, crack, and warp like crazy as it dries out.
Curing is non-negotiable. Allowing the wood to dry slowly and evenly is the single best thing you can do to prevent deep cracks and ensure your stepping stones last for years.
To do it right, find a dry, sheltered spot like a garage, shed, or covered patio. Stack the rounds with small pieces of scrap wood (we call these "stickers") between each one. This allows air to circulate around the entire surface of every slice, which is key for even drying.
So, how long do you wait? It really depends on your local climate and how wet the wood was to begin with. Be prepared for it to take anywhere from a few months to over a year. You'll know they're getting close when the wood feels noticeably lighter and you see small, stable cracks forming on the ends, not deep, fresh splits.
Sanding and Sealing for Longevity and Safety
Once your wood slices have cured, it's time for the real finishing work. This is the part where a rough-cut piece of wood becomes a safe, comfortable, and weather-ready stepping stone. It's tempting to rush this stage, but trust me, skipping it is a surefire way to end up with a splinter-filled path that won't last a season.
First up is sanding. The main goal here is simple: create a surface that’s safe for everyone, especially for little bare feet. You’re not aiming for a mirror-smooth finish, but you absolutely have to get rid of any splinters or sharp edges left behind by the chainsaw.
An orbital sander armed with 80-grit sandpaper is your best friend for this job. Concentrate on the top surface and the top edges. Every few minutes, run your hand over the wood to feel your progress. It should feel smooth and inviting to the touch.
Choosing The Right Sealant
With the surface perfectly prepped, you need to protect your new stepping stones from their biggest enemies: moisture and UV rays. The sealant you pick doesn't just determine how long the wood lasts—it also dictates how it looks and feels underfoot.
You've got two main families of sealants to consider:
- Penetrating Oils: These soak deep into the wood, nourishing it from the inside and making the natural grain pop. They leave a matte, natural-looking finish that doesn't get slippery when it’s wet.
- Surface Sealers: Products like spar urethane or exterior varnish form a thick, plastic-like film on top of the wood. While they offer great water protection, this film can get slick and might eventually peel or flake off, which means a lot more work to refinish later.
For a child-friendly path, a high-quality penetrating deck oil or a tung oil finish is almost always the better choice. You completely avoid the slippery-when-wet problem, and they're much easier to reapply down the road when the wood needs a little refresh. This focus on safety and material choice echoes the principles of creating a secure environment for kids, a concept we dive into in our article on non-toxic kids furniture.
Crucial Tip: No matter what sealant you go with, you have to coat every single surface of the wood slice. That means the top, the sides, and—most importantly—the bottom that sits on the ground. Sealing only the top creates an imbalance where moisture gets trapped underneath, which is a fast track to rot.
Applying The Finish for Maximum Protection
Application is pretty straightforward. Just grab a paintbrush or a clean rag and apply a generous coat of your sealant. Let that first coat soak in for the time recommended on the can, then wipe away any extra that hasn't been absorbed.
I always tell people to apply at least two or three coats. Pay special attention to the end grain—the top and bottom surfaces—because that’s where the wood is thirstiest. This thorough sealing is what really gives your path its staying power.
This desire for durable, natural materials is something we're seeing everywhere in home design. In fact, the stone flooring market is projected to hit USD 19.9 billion by 2029, driven by this exact preference for sustainable and long-lasting options. It just goes to show how much we value bringing natural, enduring elements into our living spaces.
Installing Your Wood Stepping Stone Path
This is where the magic happens. A proper installation is what turns your beautifully finished wood slices into a real, functional path. It's the difference between a sturdy, long-lasting walkway and a wobbly, disappointing mess.
Getting the foundation right is everything. It ensures your stepping stones stay put and, just as importantly, stay dry.
Creating a Stable and Dry Foundation
First things first, you need a plan. Lay your wood slices out on the grass to get a feel for the path's flow and spacing. Once you love the layout, grab a spade or some landscape paint and trace around each one. Now you can set the wood aside and get to digging.
You’ll want to dig out the soil inside each outline to a depth of about 6-8 inches. This might seem like a lot, but it’s the secret to creating a solid base that drains well. A wood stepping stone sitting directly on damp soil is just asking for premature rot.
With the holes dug, it's time to build your drainage layer. Fill the bottom 4-6 inches of each hole with coarse gravel or crushed stone. This creates an underground reservoir, letting rainwater drain away quickly instead of soaking the bottom of your wood slice.
A Pro Tip from Experience: Don't just dump the gravel in and call it a day. Use a hand tamper or even the end of a 4x4 post to pack it down firmly. A compacted, level base is non-negotiable if you want to prevent your stones from wobbling or sinking over time.
Setting Each Stone Perfectly
On top of that compacted gravel, you'll add a 1-2 inch layer of coarse sand or pea gravel. This finer layer is your secret weapon for getting each stone perfectly level, allowing for those tiny micro-adjustments.
Now, place a wood slice into its prepared spot. Gently wiggle it into the sand until it feels solid and secure. Use a small level to check it from side to side and front to back. If it's not quite right, just lift it out and add or remove a bit of sand. This little bit of patience is what creates a safe, trip-free surface for everyone.
Finishing Touches for a Polished Look
Once all your stones are firmly in place, it's time for the details that will make the path look like it has always been there. You'll need to fill the small gap around each stone, and you have a few great options:
- Pea Gravel: A classic choice that fills the gaps nicely and adds to the excellent drainage.
- Mulch: This creates a soft, natural look that blends beautifully with nearby garden beds.
- Ground Cover: For a truly integrated look, try planting a low-growing, durable ground cover like creeping thyme or moss to create a living border.
This kind of attention to detail is what homeowners look for in all their landscaping. In fact, the global natural stone industry was valued at around USD 35.5 billion in 2023, which just goes to show how much people value durable, beautiful outdoor materials. A well-installed wooden path can proudly meet that same high standard. You can discover more insights about the natural stone market on dataintelo.com.
This project is a fantastic way to add charm to your yard. Creating functional, kid-friendly zones is always a win. For more ideas on making your outdoor space perfect for little ones, check out our guide on building an outdoor kids kitchen.
Common Questions About Wood Stepping Stones
Even with the best plans laid out, a few questions always seem to pop up once you get started on a new project. That’s perfectly normal. Getting the right answers, especially around durability and safety, can be the difference between a path you love for a season and one you enjoy for years.
Let's walk through some of the most frequent questions we hear, because getting these details right is what turns a good DIY project into a great one.
How Long Will a Wood Stepping Stone Path Last?
This is the big one, and the honest answer is: it depends. The lifespan of your path really comes down to a few critical choices—the type of wood you use, your local climate, and how well you install it.
A path built with a super rot-resistant wood like Black Locust, for example, can easily last 20 years or more, even sitting right on the ground. But if you were to use an untreated softwood like pine, you might only get a couple of seasons before it starts to look worse for wear.
By far, the biggest factor in how long your path lasts is drainage. A wood stepping stone set on a proper, deep base of gravel will always outlive one that's just placed on damp soil. It’s that simple.
A little extra effort on the installation and sealing can often double the life of your path. It really does pay off in the long run.
Are Wood Stepping Stones Slippery When Wet?
They definitely can be, but this is a problem you can prevent with a bit of foresight. The main culprit for a slippery surface is algae or moss, which just loves to grow in damp, shady spots.
Your choice of sealant plays a huge role here. Steer clear of thick, film-forming finishes like varnish or polyurethane. These create a plastic-like coating on the wood that becomes incredibly slick when it gets wet.
The better option is a penetrating oil sealer. This type of finish actually soaks into the wood fibers, protecting them from the inside out without leaving a slippery film on top. For extra grip in rainy climates or shady areas, you can even find non-slip additives to mix right into your final coat of sealer.
What Is the Best Way to Maintain My Wooden Path?
A little bit of simple, consistent care is the secret to keeping your path looking great for years. Think of it as a quick annual check-up.
Here’s an easy routine to follow:
- Inspect each spring: Take a walk down the path. Look at each stone and check for any deep cracks, soft spots that could be rot, or just general wear and tear.
- Give it a good scrub: Grab a stiff-bristled brush and some plain water to clear off any dirt, leaves, or green stuff that’s built up over the winter.
- Reseal when needed: This is your most important job. Reapplying a fresh coat of your outdoor wood sealant every 1-3 years is your best defense against moisture and sun damage. The product you use and your weather will determine how often you need to do it.
Think of that yearly coat of sealant like sunscreen for your wood. It’s a small task that provides powerful, long-term protection for your beautiful walkway.
At Ocodile, we believe in creating safe, beautiful, and practical spaces for families to enjoy together. Our child-friendly furniture is designed with the same principles of safety and durability that make for a great outdoor project. Discover how our products can help your little ones explore their world safely. Learn more at Ocodile.