


 - Monica
 - Lindsay
DIY Mason Jar Holder: A Family-Friendly Building Guide
Pencils migrate to the kitchen table. Hair ties collect on the bathroom counter. Marker caps vanish, but the markers stay. In a family home, the problem usually isn't owning too much. It's that small daily-use items never seem to have a stable place.
A good Mason jar holder solves that in a simple way. It turns loose objects into visible, contained storage that kids can understand and adults can maintain. When the holder is built well, it works in the kitchen, the playroom, the bathroom, and even by the entryway.
From Farmhouse Decor to Family Organizer
The Mason jar has a long history, but that history matters here for a practical reason. The modern Mason jar traces to inventor John Landis Mason, who patented the threaded screw-top jar on November 30, 1858, and the design's key innovation was a threaded mouth sealed with a metal band and lid to make the container airtight and watertight. That format has survived for more than 160 years, which helps explain why jars still feel at home in everyday storage, not just canning (brief history of the Mason jar).
That staying power is why I like building holders around jars instead of buying flimsy organizers with odd compartment sizes. Mason jars are easy to remove, easy to wash, and easy to repurpose when a room changes. Today's crayon station becomes tomorrow's toothbrush organizer.

Why families need utility, not just style
A lot of mason jar content still leans hard into rustic decor. That can be charming, but charm doesn't help when cotton swabs tip over into the sink or colored pencils roll under the sofa. What families usually need is contained, washable, grab-and-go organization.
Recent home-improvement coverage also reflects that shift. Mason jar organizer ideas now show up in bathrooms, kitchens, and garages, not only in floral or decorative displays. If you're already rethinking family storage more broadly, these toy storage organizer ideas for small spaces pair well with the same mindset.
Practical rule: If a holder makes cleanup faster and keeps glass stable, it's useful. If it only looks good on a styled shelf, it won't last in a busy home.
Where a mason jar holder works best
The best spots are the ones that generate repeat clutter.
- Kitchen counters: Utensils, tea bags, straws, snack picks, or baking tools.
- Bathroom vanities: Toothbrushes, combs, bath toys, or hair accessories.
- Homework zones: Pens, scissors, glue sticks, paintbrushes.
- Entry areas: Keys for adults, sunglasses, reusable labels, small grab-and-go items.
If you also like using jars for plants or seasonal displays, these decorating tips for plant lovers can help you blend practical storage with greenery without turning the whole project into decor-only clutter.
A family-safe holder isn't about copying a farmhouse photo. It's about creating one dependable place for the things your household reaches for every day.
Building Your First Project A Countertop Caddy
A countertop caddy is the easiest place to start because it doesn't ask your wall to do any work. You build the frame, fit the jars, smooth every edge, and put it to use right away. For families, that's a big advantage. You can test the idea before committing to a wall-mounted version.
A proven build workflow for a 3-jar holder uses an internal cavity of about 4 in × 12 in with an internal height of about 3 in if you want labels to remain visible. The same method uses a dry-fit first, then fastening with 1 1/4 in deck screws after pre-drilling to reduce splitting risk (3-jar Mason jar holder build details).
Start with solid wood if you can. Pine is beginner-friendly, easy to cut, and easy to sand. I avoid crumbly sheet goods for kid-adjacent projects when edges will be handled often. A caddy gets picked up, slid, wiped, and bumped. The material has to tolerate real life.

A beginner-friendly tool setup
You don't need a full workshop. For a straightforward caddy, gather:
- A saw: A miter saw is convenient, but a handsaw works if your cuts are careful.
- A drill and drill bits: You'll use this for pilot holes.
- Clamps: They keep parts aligned during dry-fitting and fastening.
- Sandpaper: Start coarser if needed, then move finer for touchable edges.
- Wood glue and screws: Glue helps alignment, screws provide dependable mechanical hold.
If you want a deeper read before choosing fasteners, this guide to expert advice on woodworking screws is worth reviewing. Screw type changes how cleanly your wood pulls together.
The build order that usually works
A lot of beginner frustration comes from assembling too early. Build in this order instead.
- Measure your jars first. Don't trust memory. The jar diameter determines spacing, and spacing determines whether fingers can grip each jar comfortably.
- Cut the base and side pieces. Keep the design simple for your first one. A low-sided box style is forgiving.
- Dry-fit everything. Set the jars in place before drilling. You'll notice crowding, tilt, or a side wall that's too tight.
- Pre-drill the screw holes. This matters most near board ends where splitting is common.
- Glue, clamp, and screw. Tighten enough for contact, not so much that you distort the frame.
- Sand every edge your child might touch. Corners that look minor on the bench feel sharp in use.
Dry-fitting catches more mistakes than sanding can fix later.
If your broader DIY list includes child-centered furniture, these Montessori furniture plans follow the same useful principle. Build for reach, independence, and stable use.
A video can help if you prefer seeing assembly in motion:
What makes a caddy family-safe
The safest countertop caddies share a few traits:
| Feature | Why it matters in a family home |
|---|---|
| Low center of gravity | Reduces tipping when a child removes one jar |
| Smooth inside edges | Makes jars easier to lift without scraping knuckles |
| Enough finger room | Prevents forced gripping and dropped glass |
| Protective bottom pads | Helps keep the caddy from sliding and protects surfaces |
What doesn't work well is overbuilding for appearance. Very tall sides make jars harder to remove. Tiny decorative handles collect grime. Rough reclaimed wood can look nice, but if it sheds splinters, it doesn't belong near little hands.
Creating a Space-Saving Wall Sconce
A wall-mounted Mason jar holder earns its place when the counter is already full. In a bathroom, it can hold toothbrushes, combs, and washcloths. In a craft corner, it keeps scissors and markers visible without taking up desk space. The difference between a good wall build and a risky one is installation.
One effective approach uses a two-step installation. First, a baseplate mounts to drywall, wood, or masonry. Then the jar bracket secures with a quarter-turn clockwise twist-lock. Similar shelf brackets are also described as made from 14-gauge mild steel and powder-coated, which points to stiffness and corrosion resistance as important features in holders meant for repeated removal and reattachment (wall-mounted bracket installation details).
Why retention matters more on the wall
A countertop caddy can wobble and still be corrected with a hand. A wall holder has no such forgiveness. If a jar shifts forward, or if a bracket isn't positively retained, gravity takes over.
That's why I strongly prefer mechanical retention over decorative hanging methods. A jar ring screwed to a board may look clever, but if the assembly depends on friction alone, it isn't the first design I'd choose in a hallway, child's bathroom, or play area.
How to mount with caution
Use a backing board wide enough to give you clean screw placement and enough spacing between jars. Before anything goes on the wall, identify what you're mounting into. Drywall, wood, and masonry behave differently, and your fasteners need to match the wall, not just the holder.
Keep these checks in mind:
- Studs first: If the location gives you a stud, use it.
- Anchor choice matters: If there's no stud, match the anchor to the wall material and the intended use.
- Mounting height changes risk: A toothbrush holder at adult chest height behaves differently from a toy holder at toddler reach.
- Moisture changes maintenance: Bathrooms need more frequent visual checks because humidity can affect wood and hardware over time.
In a home with children, wall-mounted storage should resist both vibration and curious hands.
If you're mounting any storage or furniture in a child-focused space, these ways to secure furniture to the wall are a useful companion read.
Common mistakes to avoid
The most common failures aren't dramatic design flaws. They're small shortcuts.
- Using short screws because they're already in the toolbox
- Skipping a level and accepting a slight lean
- Mounting into weak material without proper anchors
- Placing glass storage where a swinging door or active child can hit it
- Assuming a decorative bracket is automatically structural
A good wall sconce should feel boringly solid. If you can shake the board by hand, or if a jar twists loosely in place, stop there and fix it before the holder ever goes into daily use.
Designing Portable and Travel-Ready Holders
Some storage needs to stay put. Some storage needs to move with the family. A portable Mason jar holder makes sense when kids carry supplies from room to room, or when you want one contained setup for homework, crafting, or outdoor meals.
This is where the mason jar holder really leaves the decor category behind. Recent examples show the format being used for bathrooms, kitchens, and garages, not just floral displays, which fits the bigger move toward utility and organization over display-only use (mason jar organizers for practical spaces).

The caddy kids can actually carry
The best portable versions don't try to be miniature furniture. They act more like a sturdy supply tote built around jars.
For family use, I look for three things:
- A comfortable handle: Rounded, not sharp-edged, and centered so the load doesn't tilt.
- Snug compartments: The jars shouldn't rattle into each other when a child walks.
- A wide enough base: Portable doesn't mean top-heavy.
A good example is an art caddy with jars for pencils, glue sticks, paintbrushes, and washable markers. It can live on a shelf, move to the table for use, then go back in one trip instead of six.
Making a travel-safe version
Road trips and outdoor use need a different mindset. Loose glass in a moving car is a bad plan. If you want a travel-ready holder, build around restraint.
That usually means adding one or more of these features:
| Portable feature | Why it helps |
|---|---|
| Dividers | Keep jars from knocking together |
| Elastic or strap retention | Helps stop jars from bouncing upward |
| A lid or cover board | Adds containment during transport |
| Soft lining at contact points | Reduces noise and wear |
For family travel, I also keep contents boring and safe. Crayons, pencils, snack napkins, or dry craft items are fine. Anything wet, sticky, sharp, or breakable beyond the glass itself belongs in a different container.
Static versus portable use
A static holder can prioritize visibility and easier access. A portable one has to survive motion. That's the trade-off.
If the holder will move often, keep the design simpler than you think you need. Decorative cutouts, narrow feet, and fragile add-ons rarely survive repeated carrying. Utility wins here, and kids notice that quickly. They use the version that's easiest to lift, not the one with the prettiest finish.
Finishing and Styling for a Family Home
Finishing is where a project either becomes family-ready or stays in the category of "looks nice on a shelf." A rough build with a safe, durable finish will outlast a prettier build finished carelessly. That's especially true in kitchens and bathrooms, where surfaces get touched, wiped, splashed, and bumped.
I treat the finish as part of the structure. It affects how easy the holder is to clean, whether small hands get splinters, and how well the wood handles moisture. In a child-heavy home, that matters more than decorative distressing.
What to prioritize first
Start with touch and cleanup, not color. Run your hand over every edge, handle, and inside face. If anything catches your skin now, it will bother a child later.
A practical finishing sequence usually includes:
- Sanding all contact points well: The rim area, handle, corners, and bottom edges matter most.
- Choosing low-odor products: Especially for indoor projects that will cure inside the house.
- Sealing for wipeability: Bathroom and kitchen holders should clean easily with a damp cloth.
- Protecting the base: Felt pads or similar soft feet help protect counters and reduce sliding.
Child-safe styling choices
If children will use the holder directly, keep the decorative choices simple and durable. Painted labels, wipeable name tags, or one clean color often age better than layered embellishments that peel or trap grime.
Good family-home options include:
- A chalkboard label area for changing contents as kids grow
- Simple painted icons so pre-readers know where items go
- Natural wood with a sealed surface for a calm, less busy look
- Color-coding by room or child to reduce mix-ups
A finish should help a holder survive daily handling, not turn cleaning into another chore.
What usually doesn't age well
Some finishes look appealing on day one and become irritating by month two.
Avoid these if you want long-term usability:
- Heavy distressing inside grip areas, because roughness catches dirt and skin
- Loose decorative wraps or twine, especially near sinks or sticky craft supplies
- Overbuilt embellishments, because they snag and break
- Dark finishes without labels, because kids can't quickly tell what belongs where
If you want children to take ownership, let them help within limits. They can choose colors, simple motifs, or label symbols. Adults should still handle the sanding, sealing, and any products that need careful ventilation or curing. The best family projects invite participation without handing over the risky steps.
Essential Safety Checks and Long-Term Maintenance
Many DIY articles stop too early. They show the finished holder and skip the boring part. In family spaces, the boring part is what keeps the project safe.
A major gap in common DIY coverage is mounting safety and load limits. Many tutorials focus on the craft side but don't explain how much weight a holder can safely carry, how anchor choices affect failure risk, or how often the setup should be checked. That gap matters even more when storage sits within a child's reach (discussion of load-limit and safety gaps in DIY coverage).

What to inspect before regular use
Treat the first week like a testing period. Fill the jars with the actual items you plan to store, then watch how the holder behaves during normal use.
Check for these warning signs:
- Movement at joints: If the wood opens slightly at a seam, the frame is under stress.
- Jar instability: A jar should sit or lock in place without rocking.
- Fastener creep: Screws that start backing out need attention right away.
- Wall movement: Any shifting between holder and wall means the mounting method needs review.
- Child interaction risk: If a child can swing from it, pull it, or use it as a step, reconsider placement.
A simple maintenance routine
You don't need a formal schedule on paper, but you do need a repeatable habit. Tie the check to something you already do, like deep-cleaning the bathroom or rotating art supplies.
A useful routine looks like this:
| Area | What to look for |
|---|---|
| Wood surfaces | Cracks, roughness, water staining, swelling |
| Hardware | Loose screws, rust, bracket play |
| Jar contact points | Chips, rubbing marks, looseness |
| Bottom or wall contact | Sliding pads missing, wall scuffs, wobble |
For humid rooms, wipe the holder dry after heavy splashing and don't let water sit where the jar touches wood or metal. For countertop versions, lift to clean underneath instead of dragging the holder across the surface.
When to repair and when to retire
Not every issue needs a rebuild. A loose screw, missing pad, or surface rough spot is usually fixable. Structural cracks, recurring wobble, or unreliable wall attachment are different. If the same problem returns after repair, the design is telling you something.
If you wouldn't trust the holder during a rushed morning with tired kids around, it isn't ready for daily use.
A few final guidelines help keep these projects sensible:
- Keep heavier contents lower: Stability improves when the weight stays down.
- Don't place glass where rough play happens: A beautiful organizer doesn't belong in the path of flying toys.
- Reassess as children grow: A safe location for a toddler may become easy climbing height for an older child.
- Choose access intentionally: Adults may want glass at hand. Young children may need a safer alternative location or different contents.
A well-made Mason jar holder should make family life calmer, not add another low-grade safety worry. That's the standard to build toward.
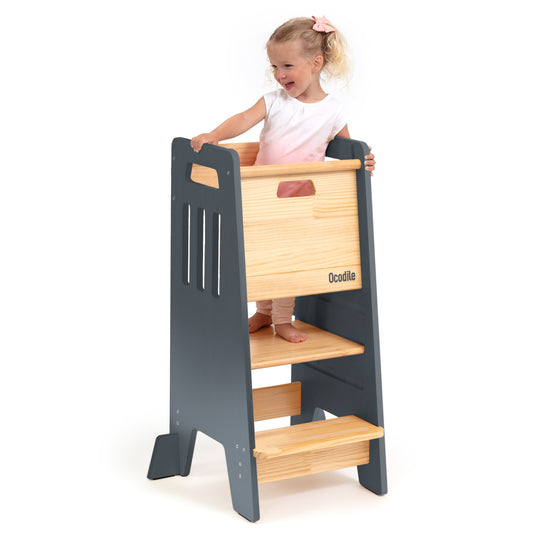
If you're building a more organized, child-friendly home and want ideas beyond small DIY projects, Ocodile is worth a look. Their approach centers on safe, practical furniture for families who want children to participate in daily life with more independence and less clutter.